PICKUP/DELIVERY Reserve
Reserve Order To-Go

Frango a Passarinho (Brazilian Fried Chicken)

frango a passarinho, brazilian fried chicken, piled on a white dish with a lime wedge garnish

Nearly every culture has a version of battered and fried chicken. From katsu in Japan to pollo frito in Italy, the combination of juicy chicken coated and a crunchy crust is a universal favorite. No surprise, then, that Brazil has its own version of fried chicken: frango a passarinho. It is a staple in the bar scene but is just as delicious when enjoyed at home. 

What is Frango a Passarinho?

Frango a passarinho has a somewhat comical English translation: “chicken like a little bird.” The name is a reference to the bite sized pieces that are used. A whole roasting chicken is reduced to mini morsels; you are effectively making a “little bird” from the bigger bird, or chicken. It’s probably best not to think too much about it. 

When Do Brazilians Eat Frango a Passarinho?

Brazilian fried chicken is often featured on petiscos menus. Petiscos are simply the Brazilian version of tapas–small dishes meant to be shared with friends at a crowded boteco, or bar. Brazilians will often make a night of it, socializing and wandering from bar to bar, enjoying frequent little bites to help insulate against the inebriating effects of alcohol. (Check out our recipe for montaditos for another petisco favorite.)

Do You Have to Use a Whole Chicken?

No, in fact our recipe for frango a passarinho uses only wings and drumettes. Traditional recipes often call for chopping up a whole chicken into tiny pieces–.even the wings are divided into two or three pieces. We’re of the opinion that this is a) too much work and b) too little reward per piece, especially when navigating around bones. Furthermore, the dark meat of the wings and drumettes is less prone to drying out than breast meat, which means you can get a crispier crust without overcooking them. 

Do You Marinate Frango a Passarinho?

Yes, a simple marinade of garlic, lime juice, salt, and pepper is used to pump up the flavor and texture of your Brazilian fried chicken. We also like to add a little brown sugar for sweetness and some fresh, chopped cilantro for an herbaceous kick. You only need to marinate the chicken for an hour, but overnight will be ideal. 

Recipe for Brazilian Fried Chicken (Frango a Passarinho)

Ingredients:

2 lbs chicken wings and drumettes
4 cloves garlic, finely minced
Juice of 2-3 limes (four tablespoons)
2 tsp salt
Freshly ground black pepper
½ cup chopped cilantro
2 tbsp brown sugar
1.5 cups flour
Vegetable oil for frying
Chopped cilantro and lime wedges for garnish

Instructions:

  1. In a large bowl, whisk together the minced garlic, lime juice, 1 tsp salt, black pepper, brown sugar and cilantro. Toss in the chicken and stir until evenly coated, then let it marinate in the fridge for at least 1 hour.
  2. Heat vegetable oil in a deep fryer or large, deep skillet to 350°F (175°C).
  3. While the oil is heating, prepare your flour mixture: mix the flour, 1 tsp of salt, and a few grinds of black pepper in a shallow container. 
  4. Add a few pieces of chicken to the flour mixture and roll to coat. Shake off any excess and transfer the chicken to a tray or dish. Repeat until all the chicken has a nice dusting of flour.
  5. Place half the chicken carefully in the hot oil and cook until crisp and golden brown and they reach an internal temperature of 165 degrees fahrenheit. This should take around 10-12 minutes. Transfer the chicken to a cooling rack lined with paper towels. Repeat this process with the rest of the chicken.
  6. Add a squeeze of lime over the finished chicken and garnish with fresh cilantro and lime wedges. 

Tips for Extra Crispy Brazilian Fried Chicken

  1. Make sure the oil is the right temperature. Oil that is too hot will result in a burnt crust and raw chicken. By contrast, oil that is too cold can result in a soggy crust that is too oily and pale in color.
  2. Fry the chicken in batches. Overcrowding the pot will drop the oil temperature and cause uneven cooking.
  3. When dredging the chicken in the flour mixture, press the pieces into it with a good amount of force. This helps the mixture stay onto the chicken when frying. 

Brazilian Food Catered

Getting back to the grind for 2024? Why not start the year in style with Texas de Brazil’s catering service? Delicious churrasco meats and our famous side dishes brought right to your office will set the mood for a productive and motivated new year. Our dishes are slow-roasted, so please give us at least 5 hours to prepare your perfect meal. Go online to place an order today. 

Easy Side Dishes for Ham

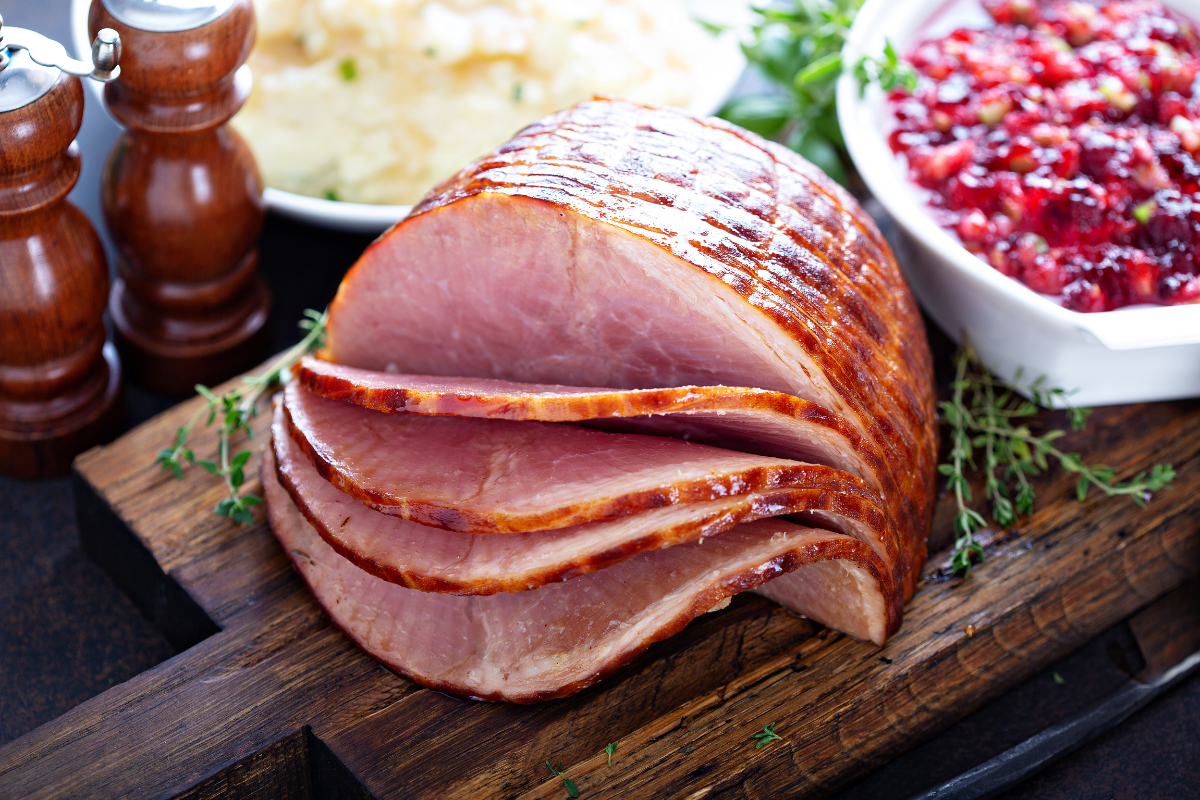
sliced ham

While turkey continues to be the favored holiday dinner protein, many Americans also choose ham as their main dish. In fact, around 318 million pounds of ham was eaten for Christmas in 2022. These days, ham is more expensive than many other meats, thanks to rising labor and food production costs. You may be looking to offset your pricey porcine with a few easy and pocket-friendly accompaniments. We’ve got you covered. Here are a few ideas for easy side dishes for ham that are fast, cheap, but still delicious.  

Quick Side Dishes for Ham Dinner

Brazilian Cheese Bread

a basket of Brazilian cheese bread

First on the list of our easy side dishes for ham: Brazilian cheese bread. Instead of the traditional yeast roll, why not try your hand at some gooey, cheesy pao de queijo? Made from tapioca starch, these bite-sized morsels are nutty, chewy, and absolutely addictive. Bonus: they are completely gluten free and made with ingredients you likely already have on hand (aside from the tapioca flour). Try stuffing them with sausage if you really want to wow your guests. 

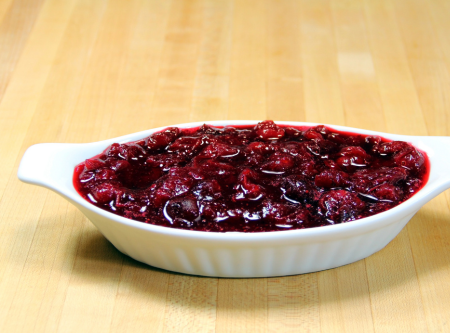
Spicy Cranberry Sauce

cranberries in a white serviing bowl

Our recipe for boozy cranberry sauce with a little heat revs up this traditional holiday favorite. We use vanilla, cinnamon, clove, and a big pinch of cayenne pepper to cut through the sweetness of the dish, adding a healthy splash of aged cachaca for even more flavor. The cachaca is by far the priciest part of this recipe; you can replace it with water or a little rum, if you already have that on hand. 

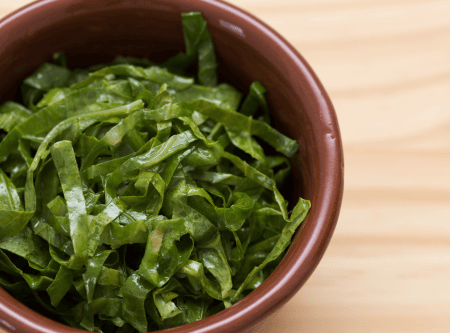
Couve Mineira (Brazilian Collard Greens)

Brazilian finely sliced collards with bacon

You may not think of collard greens when you are in the market for “easy” ham side dishes. That is because traditional Southern recipes often take hours to stew the greens until they are tender. Brazilian collards cook up quickly since they are sliced into uber-thin strips and sauteed in oil. Add a little garlic, onion, and bacon, and you have a delicious accompaniment for your holiday ham. 

Brazilian Rice

Brazilian long grain rice with mint garnish

Next up on our list of easy side dishes for ham: rice. No holiday meal in Brazil (or any meal, really) is complete without the ubiquitous arroz Brasileiro: basmati rice toasted in oil then slow-simmered with refogado, a puree of garlic and onions. If you don’t have the refogado mix, don’t worry about it: finely minced garlic and onions will work just as well. The only thing left is olive oil and white rice–doesn’t get much cheaper than that!

Steakhouse Garlic Mashed Potatoes

a bowl of garlic mashed potatoes

If you’d rather stick with potatoes for your starch fix, we totally understand. Mashed potatoes are a classic and easy side dish for ham for a reason: they are inexpensive, filling, and so delicious. They are basically comfort food at its finest. You simply can’t go wrong by punching up the flavor with a little (or a lot) of garlic, like we do in our steakhouse inspired mashed potato recipe

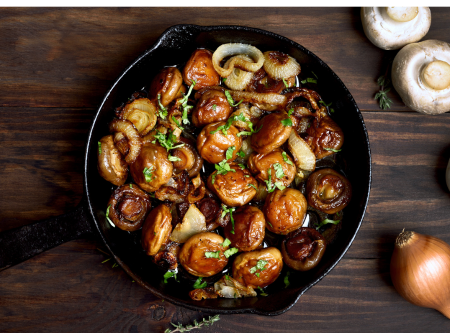
Burgundy Mushrooms

burgundy mushrooms in a black castiron skillet

Here’s another cheap and easy side dish for ham this holiday. Our take on Burgundy mushrooms slowly simmers them in red wine, stock, garlic, Dijon mustard, and fresh herbs. The sauce alone is delicious, especially spooned over those garlic mashed potatoes we mentioned. 

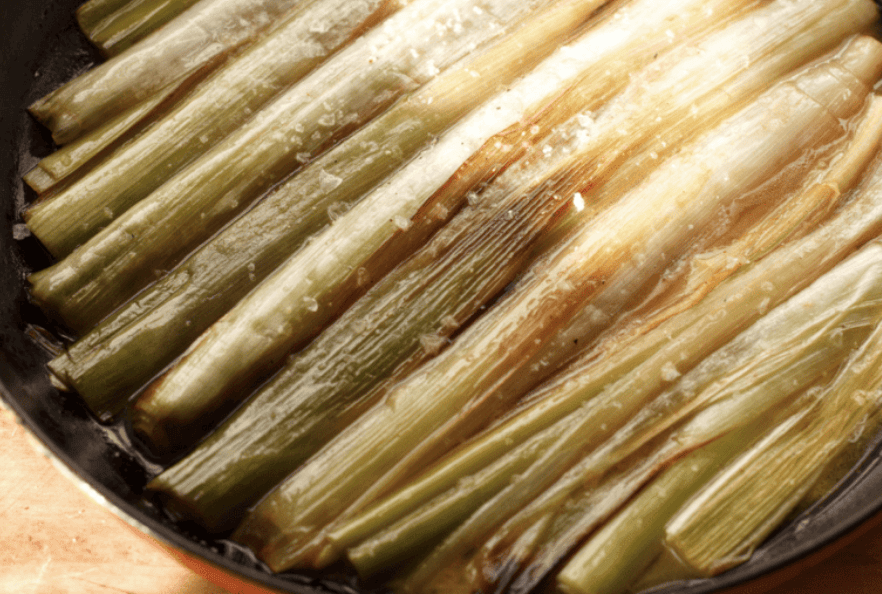
Caramelized Leeks

braised leeks in a pan

Leeks don’t often make it to the holiday table as a stand-alone side dish, and we think that’s rather tragic. When prepared with the right ingredients, they become buttery, caramelized, and absolutely delicious. In our braised leeks recipe, we take the sweetness up a notch with a balsamic reduction. Heap some on top of your slice of ham so you can have some with every bite. 

Christmas Dinner Catered

If all else fails, you can always host the perfect holiday meal with Texas de Brazil’s takeout options. Right now, you can pre-order our Beef Ribs Holiday Feast: fall-of-the-bone ribs served with your choice of two side dishes, a mess of Brazilian cheese bread, and zesty chimichurri sauce for dipping. The kit feeds 6-8 people and comes hot and ready to eat. Order yours for pick up on 12/24, 12/25, and 12/31 between the hours of 1pm and 5pm. 

Spiked Eggnog (Licor de Ovos)

two glasses of eggnog garnished with cinnamon sticks

jump to recipe button

Ah, eggnog: you either love it or you hate it. It is sweet, spiced, creamy, and, well, eggy. For many, the holiday season isn’t complete without a chilled glass of this unusual concoction. We certainly don’t mind a sip or two, especially when spiked with aged cachaca. Keep reading for a little eggnog trivia and our spiked eggnog recipe (or just jump to the recipe, you won’t hurt our feelings). 

Where Does Eggnog Come From?

Most historians agree that the roots of eggnog can be traced back to medieval Britain, where a beverage known as “posset” was popular. Posset was made with milk curdled with wine or beer and often flavored with spices. It was meant to be drunk hot and often used as a treatment for cold and flu. 

Eggs and egg yolks were incorporated into posset by at least the 13th century. Monks were known to consume a version that included both eggs, wine, and figs. The wealthy elite adopted this custom and added a bit of sherry, which was more expensive at the time. Posset soon became a symbol of good health and prosperity. 

Posset was not called “eggnog” until the 17th century, when the drink made its way to the American Colonies. Sherry and wine were exchanged for rum, which was plentiful and cheap. Heaps of sugar were also added to the already-rich drink. George Washington himself had a recipe for eggnog that called for “one dozen tablespoons of sugar.” That might explain the unfortunate teeth situation. The first president’s recipe also had rum, rye whiskey, and sherry. Small wonder he forgot to specify how many eggs to use. 

Why is Eggnog Called Eggnog?

The egg part is obvious, but where did the “nog” come from in eggnog? We’ll never know for sure, but many historians posit (that’s a pun) that the term comes from “noggin,” a Gaelic word for a wooden cup. 

Why Do We Drink Eggnog at Christmas?

From its early iterations as posset to the time it was drunk in the colonies, eggnog ingredients were considered a luxury. It was thought that toasting a beverage with expensive eggs, cream, sugar, alcohol, and spices would usher in prosperity for the new year. Eggnog is also high in calories, which may have been beneficial to those with otherwise meager holiday rations. 

Today, eggnog is less about prosperity and more about festivity. We tend to give ourselves a pass at Christmas to indulge a bit, and eggnog fits the bill: it is creamy, decadent, and a little bit naughty with all those calories. 

Do Brazilians Drink Eggnog?

Yes! Eggnog is called “licor de ovos” in Brazil and is made in much the same way as American eggnog. The main difference is the liquor. Brazilians, of course, use cachaca in their eggnog in place of rum. Nutmeg is also not typically used in licor de ovo, which is flavored with pure vanilla extract instead. 

Licor de ovo is especially popular in Minas Gerais and other southern regions of Brazil, where it can get quite chilly in the Autumn and Winter months. This means it is not necessarily consumed as a holiday beverage, since Brazilian autumn begins in March. 

What is In Eggnog?

Eggs: the star ingredient, eggs provide the rich and velvety texture to eggnog. Raw eggs were historically used, but most modern recipes heat the eggs to a safe temperature before chilling.

Dairy: whole milk and heavy cream contribute to the luscious creaminess of eggnog. Some recipes may use a combination of milk and cream to balance the richness.

Sweeteners: sugar is a crucial component to sweeten the eggnog, providing a counterbalance to the richness of the eggs and dairy. Some variations might also include sweetened condensed milk or even maple syrup.

Flavorings: nutmeg is the traditional spice that gives eggnog its distinctive flavor. Other spices like cinnamon, vanilla, and cloves may also be added for complexity.

Spirits: the addition of alcoholic spirits, such as rum, cachaca, brandy, whiskey, or bourbon, is optional but adds warmth and depth to the flavor profile. Non-alcoholic versions are also popular, ensuring that everyone can enjoy this festive beverage.

What Does Eggnog Taste Like?

Eggnog is a harmonious blend of sweet, creamy, and warmly spiced flavors. The texture is velvety and thick, almost syrupy but not sticky. It is not dissimilar to a glass of melted ice cream spiced heavily with nutmeg, which gives it a distinctly peppery flavor. 

Homemade Eggnog Recipe (Licor de Ovos)

Ingredients:

6 egg yolks
½  cup white sugar
2 cups whole milk
1 cup heavy whipping cream
½ tsp freshly ground nutmeg
¼ tsp ground cinnamon
¼ tsp ground cloves
1/4 tsp ground cardamom
½ tsp pure vanilla extract
Pinch of salt
4 oz aged cachaca or spiced rum

Directions:

  1. Whisk together the egg yolks, then add the sugar and mix until light and frothy. 
  2. Heat the milk, cream, cinnamon, cloves, nutmeg, and salt in a saucepan over medium high heat.
  3. Temper the egg mixture: when the cream mixture reaches a simmer, add about 2 tablespoons to the egg mixture and stir to combine. Repeat this process until most of the cream mixture has been added to the egg mixture, then return everything to the saucepan.
  4. Whisk constantly over medium high heat for a few more minutes. Check the temperature with a thermometer: it should be 160 degrees fahrenheit or higher. 
  5. Remove the mixture from the heat and add your vanilla extract and cachaca. 
  6. Chill thoroughly, then serve in glass cups with a cinnamon stick and freshly grated nutmeg. 

Spend the Holidays with Us

Texas de Brazil is a unique and delicious fine dining destination during the holidays and all year round. Visit one of our 50+ locations this year to treat  your loved ones to a truly special meal. Also, be sure to take advantage of our current Texas de Brazil gift card deals–perfect to add to a stocking or a christmas gift basket. 


Honeynut Squash Recipe

A bowl of bright orange honeynut squash soup on a white plate.

Creamy Honeynut Squash Soup (Sopa de abobara)

Honeynut squash are some of the lesser known winter squashes, but we are here to change that! As their name suggests, they are exceptionally sweet, and their skin has a beautiful amber hue. Unsurprisingly, they lend themselves to a number of recipes, savory and sweet. Today’s honeynut squash recipe is for a spicy, creamy soup: perfect for a cold winter evening. 

Honeynut Squash vs Butternut Squash

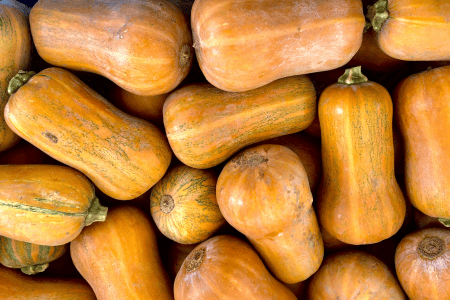
Honeynut squash are actually a hybrid between butternut squash and buttercup squash. They were an experiment by a professor at Cornell University in the 1980s, and cultivars didn’t appear in US markets until 2015. 

Honeynut squash have the appearance of mini butternut squash but with a deeper orange color (they have about three times the level of beta carotene). They are also sweeter than either a butternut squash or a buttercup squash, and their thin skin is edible. 

The average-sized honeynut squash is about 4 inches long and between 2.5 and 4 inches wide, so you need more of them for a recipe than larger varieties of winter squash. 

a stack of green buttercup squash a stack of butternut squasha stack of orange honeynut squash

Buttercup squash (top) plus butternut squash (center) equals honeynut squash (bottom).

Honeynut Squash in Brazilian Recipes

Pumpkin dishes are quite prevalent in Brazil, especially since they can be grown year round. Quibebe, for example, is a savory pumpkin stew that slow-simmers big bites of butternut squash. And Christmas tables in Brazil are often adorned with a beautiful camarao na moranga: a roasted cinderella pumpkin stuffed with a creamy shrimp soup.

Again, honeynut squash are not particularly well-known. Most Brazilian recipes call for either butternut squash or the moranga (which we know in the US as a Cinderella pumpkin or pink pumpkin) or the abobora, which is butternut squash. While there is no substituting the moranga for your stuffed shrimp recipe, you can easily use the honeynut squash in place of butternut squash in most recipes. You will just need more of them.

Where to Buy Honeynut Squash

There are a few large grocery chains that carry honeynut squash this time of year. You can find them at Costco, Wholefoods, and Trader Joes. They are also often found at farmer’s markets, but it’s a little late in the year for those. 

You could also try growing your own honeynut squash from seeds! The process is much the same as any other winter squash: plant them indoors in March, then harden them off outdoors after the last frost. Transplant seedlings to soil in May. You can also directly sow the seeds in May and June as well. 

How to Cook Honeynut Squash

Like other winter squash, honeynut squash can be roasted, stewed, boiled, sauteed, and pureed. For this soup recipe, we highly recommend roasting the squash. It is very easy to do and it truly brings out the sweet nuttiness of the squash. 

To roast honeynut squash, remove the stems at the top of each gourd. Then cut each squash lengthways in half. Scoop out the seeds and stringy bits in the middle with a metal spoon. Put each squash skin-side up on a lined baking tray. Roast them at 425 degrees fahrenheit for around 30 minutes until they are soft and you can see the sugars begin to caramelize. It will smell heavenly and the skins will wrinkle a bit. If you can easily pierce the skins with a fork, you should be good to go.

Let the squash cool and then scoop out the flesh into a bowl for later use. We won’t use the skins in this recipe, but you can certainly eat them if you want. 

Honeynut Squash Soup Recipe

Ingredients:

Two cups of roasted honeynut squash (about three squashes), mashed to a pulp
One red bell pepper, diced
Half of one yellow onion, diced
2 cloves of garlic, minced
3 cups of vegetable stock
1 tsp of salt (more to taste)
½ tsp ground cinnamon
¼ tsp cayenne pepper
Extra virgin olive oil
Freshly ground black pepper

Directions:

  1. Heat a saucepan over medium high heat. Add in a drizzle of olive oil, and sautee the bell pepper and yellow onion for two minutes, or until they start to soften. 
  2. Add in the garlic and stir for 30 seconds or so, just until you can smell it. 
  3. Pour in the vegetable stock and add in the salt, cayenne, cinnamon, and a few twits of freshly ground black pepper. 
  4. Bring the mixture to a boil then reduce to medium-low, cover, and simmer for fifteen minutes. 
  5. Stir in the honeynut squash mash and let the mixture heat up again to a rolling simmer (5 minutes)
  6. Remove the mixture from the heat and blend with an immersion blender until very smooth. Alternatively, you can pour the mixture into a stand blender, then return it to the pot and heat through once more. 

What to Eat with Honeynut Squash Soup

Enjoy your soup piping hot with a drizzle of extra virgin olive oil and a big piece of crusty french bread for dunking. It also makes a great starter for a holiday or anniversary dinner. Follow it with a main dish of churrasco steak and a dessert course of passionfruit mousse and espresso. Perfeito!

Take Advantage of Texas de Brazil’s Gift Card Bonuses

For a limited time, Texas de Brazil is rewarding gift card purchases with bonus cards. For every $100 you spend on gift cards, you will receive a $25 bonus card; and for every $50, you will earn a $10 card. They make an ideal stocking stuffer or Christmas gift basket addition. Visit our online store to learn more.

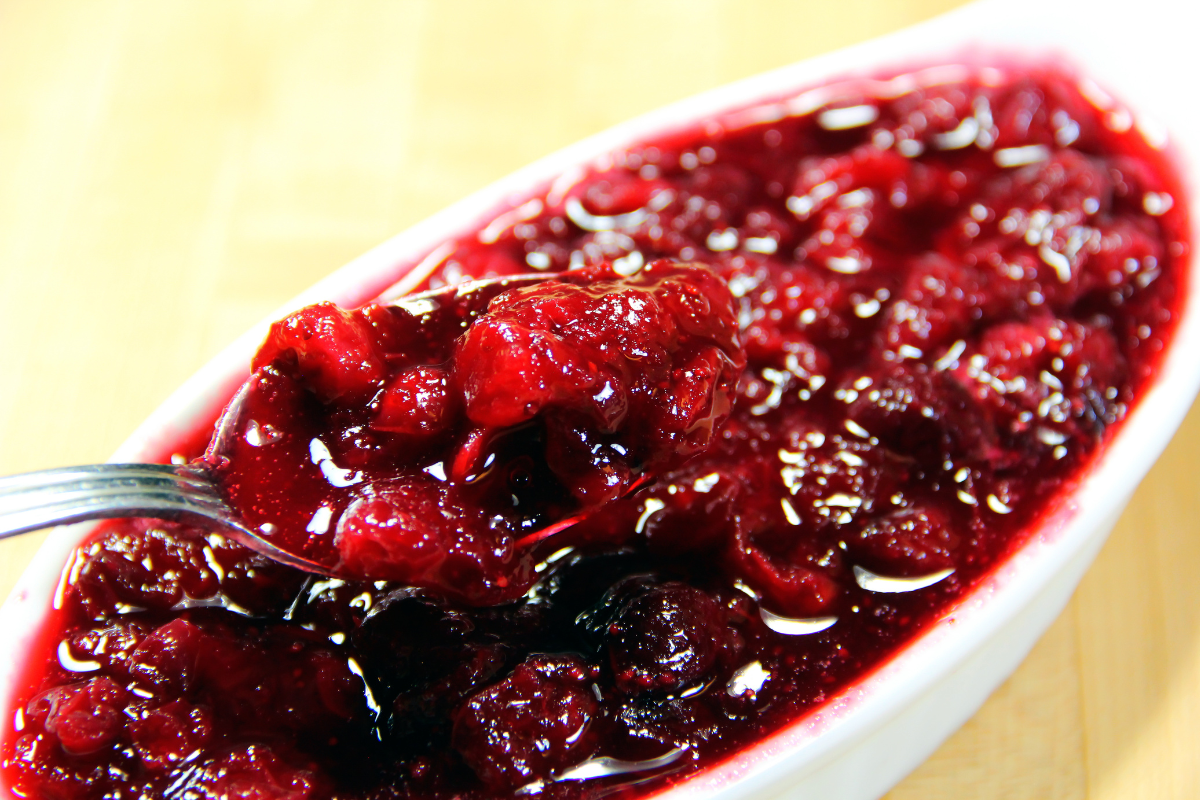
Spicy Cranberry Sauce

cranberry sauce in a white serving dish

A Classic Holiday Side with a Spicy and Boozy Twist

Cranberry sauce is ubiquitous at the American holiday table. It is deliciously sweet and tart, perfect with a bite of tender turkey meat. It is also a festive red color, which helps brighten up a plate full of brown gravy, brown stuffing, and brown rolls. But not all cranberry sauce is created equal. Everyone seems to have their own recipe they claim is the best one. We’ll happily hop on that bandwagon and present you with our recipe for spicy cranberry sauce: sweet, sour, hot, and boozy, this is something a little special. 

Brazilian Cranberry Sauce 

You may remember from our recent Thanksgiving in Brazil blog that cranberry sauce is not eaten much in Brazil. This isn’t because Brazilians don’t like it, it is simply that cranberries do not grow there. While tinned options may be available online, most holiday dinners in Brazil omit the cranberries or swap it with a chutney or sauce made from jabuticaba, which are also known as Brazilian grapes. They have a similar taste and texture to cranberries, but with a hint of blueberry. 

Good luck finding jabuticabas in the US, though. They can be grown in tropical areas like Florida, but they are definitely an exotic item around here. So we will stick with the cranberries but with a decidedly Brazilian twist: cachaca and red pepper. The resulting spicy cranberry sauce is unlike any you’ve tasted. 

What Cachaca to Use for Spicy Cranberry Sauce?

You have a couple options when it comes to choosing a cachaca for your spicy cranberry sauce. You could go for a newer, small batch variety, which will have a simpler flavor profile. Young cachaca has a distinctive grassy flavor, courtesy of the fresh sugar cane juice from which it is made. Also known as prata, unaged cachaca is famous as the alcoholic component of a refreshing caipirinha. 

Aged cachaca (“envelhecida”), on the other hand, takes on a more complex flavor. It can taste oaky, like the barrels it is stored in, along with the spice and vanilla flavors of the wood. It maintains that signature grassy flavor, but it is often more mellow. 

In order to be legally designated as cachaca envelhecida, at least half of the liquor volume must have been aged for one year or more in a wooden barrel with a capacity of no more than 700 liters (around 185 gallons). Strict regulations apply to the unaged cachaca as well. 

For this spicy cranberry sauce recipe, we like aged cachaca. Really, though, it is your choice. In a pinch, you can use spiced rum. Just be aware that no Brazilian will agree with you that cachaca and rum are the same thing. 

Other Spicy Cranberry Sauce Ingredients

Obviously, you’ll need cranberries! Fresh is best, but frozen will work as well. You will also need some warming spices: cinnamon sticks and one or two whole cloves. They pair beautifully with the aged cachaca, which has a rich herby flavor and spiciness all its own. 

We couldn’t call this “spicy cranberry sauce” without the other star ingredient: cayenne. We are using a half teaspoon, but you can add more or less depending on your desired level of spice. It will be complemented by the sweetness of orange juice and sugar, and a kiss of vanilla extract for one final note. 

Can You Make Spicy Cranberry Sauce Ahead of Time?

Yes. In fact, it is best if you do make it at least a day ahead so it has time to set. It will keep in the fridge for up to a week before serving. If you wish to make it earlier than that, you can freeze it just as well. Let the mixture cool to room temperature, then transfer the sauce to a freezer safe container or gallon bag and freeze until you are ready to use.

Spicy Cranberry Sauce Recipe with Cachaca

Ingredients:

12 oz fresh cranberries (one pack)
1 cup of orange juice (with or without pulp)
1 ¼ cups white sugar
8 oz aged cachaca or spiced rum
1 tsp real vanilla extract
2 cinnamon sticks
2 whole cloves
½ tsp cayenne pepper

Directions:

  1. Add the sugar, cachaca, and orange juice to a saucepan over medium high heat, stirring until the sugar is dissolved. 
  2. Reduce the heat to low and add in the cinnamon sticks and cloves. Cover the saucepan and let the spices infuse for 5-10 minutes, then remove them.
  3. Add in your cranberries, vanilla extract, and cayenne pepper. Stir to combine the ingredients. Bring the mixture to a boil, then reduce to medium low. 
  4. Simmer the spicy cranberry sauce uncovered until the berries begin to pop. Yes, some of them will actually pop open! Let the mixture continue to simmer until the sauce thickens. 
  5. Transfer the sauce to a container and let it cool and set in the refrigerator for at least six hours, preferably overnight. 

What to Eat with Spicy Cranberry Sauce

Of course, turkey is delicious with this spicy, boozy cranberry sauce. But we have some other ideas:

Gift Card Specials at Texas de Brazil

Be sure to take advantage of our gift card specials at Texas de Brazil. For a limited time only, receive a $25 gift card for every $100 you purchase, and a bonus $10 gift card for every $50. Perfect for tucking into stockings and Christmas gift baskets, you’ll be sure to please everyone on your list!


Picadinho With Butternut Squash

Picadinho with butternut squash and rice

A Comforting Stew with Beef and Winter Squash

Brazilian picadinho, a traditional beef stew, is a delicious and hearty dish that brings together the rich flavors of beef, butternut squash, and a medley of spices. It is a hearty, warming dish that beautifully incorporates the tastes of Fall. The colors alone are a showstopper. Plus, it is ridiculously easy to make and the ingredients are cheap. What more could you want in a winter meal?

Picadinho vs Picadillo

You may notice a similarity in this dish and another known as “picadillo.” While the two dishes share certain ingredients, they differ significantly in taste and texture. For one, picadillo is made using minced beef, while picadinho uses large cubes of meat. Picadinho also makes use of starchy vegetables, like butternut squash, in place of the salty olives and/or raisins in picadillo. Finally, picadillo is meant to cook quickly. As a stew, picadinho needs time to tenderize the meat and bloom the herbs and spices. 

What to Eat with Picadinho?

Brazilian beef stew is plenty filling enough to enjoy in a bowl all by itself. However, if you fancy pairing it with a side dish, Brazilian rice is an excellent choice. It would also taste great ladled over some egg noodles (like this estrogonofe de carne recipe), or with a side of garlic mashed potatoes

Vegetarian Options for Picadinho

While the beef is traditionally the star of Brazilian stew, you can certainly omit the meat and substitute it with some hearty chickpeas, more squash, and some diced potatoes for added “heft.” Just keep in mind that you will not need to cook the stew nearly as long, so check the veggies often so they don’t get too mushy. 

Can You Make Picadinho in the Crock Pot?

Of course! In fact, we think picadinho tastes even better in the slow cooker. We recommend taking a few steps before tossing in the ingredients:

  • Season the beef cubes with salt and pepper, then sear on all sides lightly over medium high heat.
  • Add in another twist of oil and lightly fry the garlic and onion.
  • Deglaze the pan with the wine.
  • Put the beef, garlic, onion, spices, wine, and broth into the crock pot.
  • Cook on low for six hours, or on high for four hours. 
  • When you have one hour left, add in the butternut squash, tomatoes, and bell peppers. 

Brazilian Picadinho de Carne Recipe

Ingredients:

1.5 lbs chuck steak cut into one inch cubes
Extra virgin olive oil
1 small yellow onion, diced
3 cloves garlic, minced2 tomatoes, diced
1 green bell pepper, diced
1 red bell pepper, diced
1 medium butternut squashed, peeled, seeded, and cut into 1-inch cubes
1 tsp ground cumin
1 tsp paprika (not smoked)
1 cup beef broth
1 tsp salt (more to taste)
½ cup white wine
2 bay leaves
¼ cup fresh parsley or cilantro

Instructions:

  1. Heat a drizzle of olive oil in a large, heavy-bottomed pot over medium-high heat.
  2. Season the beef with salt and pepper and sear on all sides. Transfer to a plate. 
  3. Reduce heat to medium. Add in another drizzle of oil and add the chopped onion and garlic. Cook just until softened and fragrant.
  4. Deglaze the pan by adding in the red wine and scraping up any brown bits stuck to the bottom. 
  5. Return the meat to the pot along with the squash, tomatoes, peppers, broth, cumin, paprika, salt, and freshly ground black pepper. Toss in a couple bay leaves.
  6. Bring the mixture to a rolling boil, then reduce heat to medium-low. Cover, and simmer for one hour to 90 minutes, until the meat is tender.
  7. Serve piping hot, garnished with fresh cilantro or parsley. 

TIP: If you need to thicken the sauce, you can make a cornstarch slurry: start with one tablespoon of cornstarch to two tablespoons of water. Add the mixture to your stew and bring it to a boil. Add more as needed to achieve a gravy-like consistency.

Brazilian Beef Home Delivery 

To get the freshest, highest quality meat for your next stew recipe, visit Texas de Brazil’s online butcher shop. Premium cuts of beef, lamb, and pork are available a la carte or in hand-curated boxes-all delivered right to your door. Be the host-with-the-most this holiday season and visit our website today. 


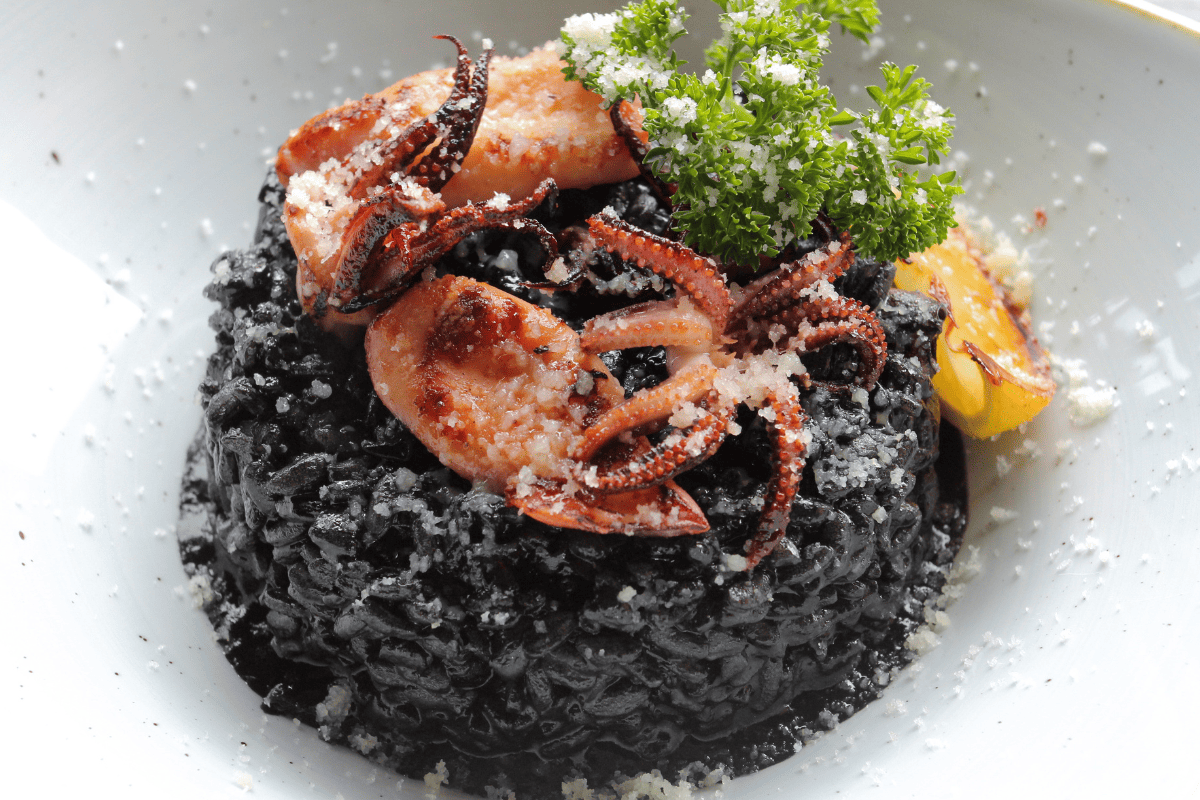
Forbidden Rice Recipe from Bahia

forbidden black rice topped with calamari and shrimp

The beautiful beaches of Bahia have long been a favorite tourist destination. The area is famous for its nightlife, clear waters, and fresh seafood. In the 1970s, it became a haven for the hippie movement after Mick Jagger visited the town of Trancoso. At that time, a hotel chef developed a unique dish evocative of the region’s melting pot of cultures and tastes: black “forbidden” rice with fruits of the sea simmered in white wine, garlic, and tomato sauce. The hotel Uxua remains in operation, although the menu changes at the current chef’s whim. Luckily, the original forbidden rice recipe from Bahia is easy and quick to make at home. 

What is Forbidden Rice?

Forbidden rice encompasses around twenty varieties of rice with a high content of anthocyanins, a pigment that gives certain foods a red, purple, blue, or black color. In the case of rice, the grains appear black when raw, then turn a beautiful purple when cooked. For this reason, forbidden rice is also known as black or purple rice. 

Researchers have determined that black rice likely arose from a simple mutation. Viewing the color as desirable, farmers then selected the plants with this mutation for growing. No known species of wild black rice have ever been found, which confirms the theory that it arose randomly after rice cultivation was well established. 

Forbidden rice produces much smaller yields than its white and brown counterparts, which makes it more expensive. Its rarity combined with perceived health effects meant it was originally reserved for only the very wealthy. In fact, when it was first cultivated in China, it was forbidden to all except the emperor and his family (hence the name). 

Is Forbidden Rice Good for You?

Forbidden rice continues to be used as both a food product and medicine in China and other parts of the world. Traditional Chinese Medicine recommends it, in particular, as a tonic for seniors. Communities in Nepal incorporate it into the diet of pregnant women. But is it really better for you than white, red, or brown rice? 

Black rice has fewer calories, less carbs, and higher levels of fiber and iron than other rice varieties. But the numbers are pretty close: 5 percent of your daily iron in forbidden rice vs 4 percent in brown rice, for example. So why is it still being touted as a superfood?

It may be due to the pigment in the rice itself, which exerts antioxidant properties not found in non-pigmented rice. Anthocyanins found in forbidden rice and other dark-colored foods are being studied for their anti-inflammatory, anti-cancer, and anti-obesity properties. Ongoing research supports their use in future pharmaceuticals for memory support as well. 

How to Cook Black Rice

You cook forbidden rice in much the same way you would any other type of rice: you boil it with water until it is tender. Ratios vary from recipe to recipe, but we find that 2 cups of water to one cup of black rice is sufficient. We also like to toast the kernels in a little oil before boiling to give them a little bite and keep the grains from sticking together too much. This is an essential step in classic Brazilian rice as well. 

What Seafood is Used for Brazilian Black Rice?

This forbidden rice recipe uses calamari and prawns, but you can use any seafood you like. Mussels would be delicious in the white wine sauce, as would clams and big hunks of buttery lobster. You can also omit the seafood entirely if you do not like it or you have an allergy. The rice on its own is a delicious side dish to almost any accompaniment, and the sauce is equally tasty on chicken and pork. 

Forbidden Rice Recipe (Arroz preto com camarão e lula)

Ingredients:

1 pound shrimp or prawns, deveined (medium size is good)
1 pound small calamari, cleaned well. (Separate the arms from the rest of the body and cut that part into ¼” slices lengthways. You will use both the arms and the slices)
1 cup black rice
½ yellow onion, diced
2 cloves garlic, minced
½ cup white wine (dry not sweet)
⅓ cup tomato sauce, unseasoned
1.5 tsp salt, more to taste
Freshly ground black pepper
Extra virgin olive oil
1 oz butter, unsalted
Fresh parsley

Directions:

  1. In a medium saucepan, heat a drizzle of olive oil over medium heat. Add in your forbidden rice and cook for a few minutes, stirring frequently. You won’t be able to tell if it is toasted due to the dark color, but you can smell it. It will have a nutty scent. Just stir it constantly for about five minutes. 
  2. When the rice is toasted, add in your onion and garlic and stir for a further minute or two until they are fragrant and softened. 
  3. Add in the salt and water and bring to a boil. Reduce the heat to medium low and cover. Simmer until the water has been absorbed and the rice is tender (around 30 minutes).
  4. While the rice cooks, prepare your seafood. Heat a skillet over medium heat and melt half of the butter (1 tbsp). Add in your prawns and cook for a couple minutes each side until they are just pink on the outside and firm, but not tough. Season with salt and pepper.
  5. Transfer the cooked prawns/shrimp to a plate. Turn the heat up to medium high. 
  6. Add in another tablespoon of butter and a drizzle of extra virgin olive oil. Fry your calamari in 2-3 batches so they cook evenly. They will finish quickly-around one minute is all they need. Be sure to flip them once while cooking. 
  7. Remove the calamari and deglaze your hot pan with the white wine. Scrape up any bits that have stuck to the bottom of the pan. 
  8. Stir in the tomato puree and tip the seafood into the sauce. Heat through, then pile high on a good scoop of the forbidden rice. Spoon any extra sauce over the top and garnish with fresh parsley. 

More Great Brazilian Recipes to Try

Fish Balls (Bolinho de Bacalhau)

fried fish balls served with wedges of lime in a silver tray.

These fried fish balls are a favorite in Brazil, especially on the Christmas dinner table. They are bite-sized, delicious, and very simple to make-three things we love in a recipe. They are, essentially, a kind of fritter, similar to coxinha or acaraje. The filling is much simpler, however, consisting only of salt cod, potato, onion, garlic, egg, and a few herbs and spices. 

Salt Cod for Brazilian Fish Balls

The traditional recipe for bolinho de bacalhau uses salt cod. We have used this ingredient before in our bacalhau com natas, or salt cod in cream. Like many salted meats, salt cod originated as a means of preserving the fish year round before refrigeration.

Cod was once especially plentiful in the Atlantic ocean, so many countries sharing a coast with these waters have a long-standing culinary partnership with this type of fish. Portuguese colonists likely brought their recipes for salt cod to Brazil, where it remains a favorite ingredient in a variety of recipes. 

While you can use fresh cod for our Brazilian fish balls, we recommend the salt version. It is easy enough to find in most online super markets and specialty stores. Salt cod has a milder flavor and chewier texture that really lends itself to a croquette. Plus, you don’t need to worry about overcooking or undercooking it.  

Preparing Salt Cod for Bolinho de Bacalhau

The salt cod we are using for our fish balls is, technically, already cooked. It does need to be soaked for at least a day, however, to rehydrate the meat somewhat and rinse away most of the salt. Ideally, you should change the water at least three times over this period, since it will become saturated with the salt and unable to draw anymore out. 

Making the Filling for Fish Balls

The filling for our bolinho de bacalhau consists of shredded salt cod pureed with potatoes, onion, garlic, salt, pepper, egg, and heaps of fresh parsley. We like to saute the onion and garlic beforehand to keep the flavor mild, but you can use them raw if you like a little bite. If you don’t have a food processor or blender, you can just as well mash the ingredients together using a traditional potato masher or whip them using your stand mixer. 

Brazilian Fish Balls Recipe (Bolinho de Bacalhau)

Ingredients:

1 lb of salt cod
2 medium russet potatoes, peeled and chopped into small chunks
½ small onion, diced
1 clove of garlic, minced
3 eggs
1.5 tsp salt (more to taste)
Freshly ground black pepper
1.5 oz chopped fresh parsley (about 3 tablespoons)
1 cup panko bread crumbs
½ cup flour
Vegetable oil for frying

Directions:

  1. Remove the salt cod from the water in which it has been soaking. Transfer it to a stock pot or large saucepan and cover with fresh water. Bring to a boil and then reduce to a rolling simmer. Cook for fifteen minutes, then remove the fish to a plate (keep the boiling liquid).
  2. Put the chopped potatoes into the same water used to boil the salt cod. Boil them until they are fork tender (around 20 minutes). 
  3. While the potatoes are boiling, heat a small skillet over medium. Add in a drizzle of olive oil, then put in your diced onions. When they have softened (1-2 minutes), add in the minced garlic and cook for a further 30 seconds.
  4. When the salt cod has cooled enough for you to handle, shred it finely with two forks or your fingers.
  5. In the belly of a food processor, add in the cooked potatoes, shredded fish, garlic, onion, salt, pepper, and parsley and pulse to combine. Then add in one egg and pulse again until you have a uniform-looking mixture. It should be fairly cohesive. If it is too crumbly, add in a little water. 
  6. Fill a large pot with enough oil to submerge your fish balls (about four cups). Heat over medium-high until it reaches 350 degrees fahrenheit. 
  7. While the oil heats, make a dredging and breading station: put ½ cup all purpose flour in one dish; beat two eggs together in a second dish; add the panko bread crumbs to a third dish.
  8. Scoop a small amount of your fish ball filling into your hands (oil them beforehand) and roll into a ball. Coat each ball with flour then dip it into the egg mixture (shake off excess). Finally, roll the ball into the breadcrumbs. Repeat until you have used all of your filling.
  9. When all your fish balls are breaded and the oil is ready, fry them in batches until they are golden brown. Transfer them to a baking sheet lined with paper towels. Serve piping hot with your favorite dipping sauce. (We recommend this creamy garlic sauce.)

More Delicious Brazilian Recipes to Try:


Chocolate Orange Cake (Bolo de Laranja)

chocolate orange cake

Orange season is fast approaching, and we can’t wait. There is nothing better than the refreshing bite of a ripe navel orange, or a glass of freshly squeezed juice. Oranges also lend themselves nicely to a variety of recipes, both sweet and savory. Today, they are the star of a truly special dessert: chocolate orange cake. 

Brazilian Chocolate Orange Cake

Strictly speaking, this is not a traditional recipe. The original recipe is from Portugal, where it is known as bolo de laranja. The Portuguese climate is especially conducive to growing oranges and other citrus, so many national dishes incorporate these fruits. Recipes vary, but orange cake is oftentimes a sheet or bundt cake eaten on Sundays during Lent. A light dusting of powdered sugar is the finishing touch. 

Brazilians (famous for their sweet tooth) prefer an orange-infused syrup to soak into the finished cake, which is also baked in a bundt or tube pan. We are taking it one step further and making a chocolate ganache to drizzle over the orange cake. 

You may find recipes for bolo de laranja that call for beaten egg whites. This gives the cake an extra lift and a crisper texture. You can certainly do this, but we are feeling lazy and are opting to get our rise through oil, baking powder, and baking soda. 

Oil vs Butter for Bolo de Laranja

You can use butter or oil for your chocolate orange cake, but we recommend oil. Oil tends to produce a more moist, even crumb than butter. This is not only important for mouth feel, but also for presentation when you slice into the cake. You won’t have any pieces crumbling away when you serve this cake. 

If you do wish to use butter, you can use the same amount of melted butter as you would oil. When using solid butter, you will need to use 25% more in volume. Our recipe today calls for ½ cup of oil, so you would use ⅔ cup of butter or other solid fat. 

Ganache for Chocolate Orange Cake

Ganache is simply chocolate slowly melted with cream. The ratio of cream to chocolate for your orange cake will depend on the type you use. In general, dark chocolate (semi-sweet) calls for a 1:1 ratio of chocolate to cream; milk chocolate requires slightly less cream, usually 1 part of cream to two parts of chocolate. 

We recommend the semi-sweet ganache for the bolo de laranja. It is already quite sweet, so the slightly bitter taste of the chocolate helps to off-set that. Plus, the appearance of the glossy dark chocolate makes it a real show-stopper. 

Feel free to add in a little boozy flavor to the ganache as well. We’re adding a splash of Grand Marnier to suit the orange theme, but a little spiced rum would do nicely, too. 

Fresh Orange Juice vs Bottled for Bolo de Laranja

Of course, we are going to recommend fresh squeezed orange juice for this recipe; and with navels coming into season soon, there is no reason to go store bought, in our opinion. Not only is the flavor unparalleled, you will benefit from the antioxidants and enzymes that are destroyed during the bottling process. 

That being said, if you don’t want to squeeze it yourself or you don’t have a good supply of fresh oranges near you, bottled will be fine. Just choose a version with pulp and no added sugar. 

Chocolate Orange Cake Recipe (Receita de Bolo de Laranja com Chocolate)

Ingredients:

For the Cake Batter:

2.5 cups AP flour
½ tsp salt
1 tsp baking powder
½ tsp baking soda
½ cup extra virgin olive oil
3 large eggs
1 cup orange juice
2 cups white sugar
For the Ganache:
9 oz bittersweet chocolate chips or roughly chopped bars
1 cup heavy cream
1 tbsp Grand Marnier

Directions:

  1. Preheat the oven to 350 degrees Fahrenheit. 
  2. In a medium bowl, whisk together the baking powder, baking soda, salt, and flour. 
  3. In the bowl of a stand mixer, add in your eggs, sugar, and olive oil. Mix on low until combined. Add in the orange juice, and mix again until blended.
  4. Add in your sifted dry ingredients and mix on low until just combined. Try not to over-mix.
  5. Grease a bundt pan with non-stick spray or butter and a coating of flour. Pour the cake batter into the pan and place in the center of the oven. 
  6. Bake for 40 minutes, or until a knife inserted into the batter comes out clean.
  7. Turn the cake out onto a serving tray and let it cool for at least an hour.
  8. When the cake is cool, make your ganache. Heat a double boiler over medium-high heat and pour in the cream. Let it heat for a couple of minutes, then add in the chocolate. Stir constantly over the heat until the chocolate is melted and the mixture is glossy. Finally, whisk in your Grand Marnier. 
  9. Drizzle the ganache over the top of the cake. Garnish with fresh orange zest and a few fresh orange slices. 

Storing Chocolate Orange Cake

Your bolo de laranja com chocolate will keep under a cake dome or in a storage container at room temperature for two days, and up to ten in the fridge.  

More Great Brazilian Recipes to Try:

Pernil de Cerdo

Pernil de cerdo on a cutting board with roast garlic

We can’t help it, we are in a cozy mood. It’s Fall, and that’s an excuse to start cooking stick-to-your-ribs meals, like creamy soups, hearty stews, and of course, roasts. There’s something so comforting about having a roast on: the smells permeating the house with the promise of something only time can achieve. Today’s recipe is for a twist on pernil de cerdo, a classic Puerto Rican pork shoulder roast that Braziliians have adopted, especially at Christmas time. 

What is Pernil de Cerdo?

Pernil de cerdo translates to “roast of pork” from Spanish. However, most Puerto Ricans simply call it “pernil” since it almost always entails pork. It is most often a pork shoulder, but some recipes use pork butt or even pork leg. 

The origins of pernil de cerdo are debatable, but it most likely became popular as a cheaper and more manageable version of lechon asado. This is a whole roast suckling pig cooked over an open fire-still a popular dish in Puerto Rico, but less accessible to home cooks working with an oven. 

What Cut of Pork to Use for Pernil?

We prefer the shoulder for pernil de cerdo since it holds its shape better after a long cook. Pork butt will fall apart if you attempt to slice it after four hours. This is not necessarily a bad thing, but it is more suited to something like pulled pork or a cuban sandwich as opposed to a centerpiece-style roast. Likewise, you won’t want to use a pork loin, since it is too tender for low and slow cooking. 

For traditional pernil, you need a pork shoulder with the bone in and skin on. The bone keeps the meat extra tender, and the skin is crisped up at the end for a crunchy, almost crackling like garnish. 

What to Serve with Brazilian Pernil de Cerdo?

Puerto Ricans often serve their pernil with fried plantains and arroz con gandules, a rice dish made with pigeon peas. Brazilians prefer to eat it with rice and other classic sides, like feijoada with farofa. 

You can serve your pernil with whatever you’d like. Roast potatoes, carrots, or turnips wouldn’t go amiss. Of course, pork almost always pairs well with apples. Try sauteeing some roughly chopped green apples with thinly sliced onions, salt, pepper, and a teaspoon of sugar for a sweet and savory companion to any pork dish. For another sweet companion, try grilled pineapple slices

What Temperature to Cook Pernil?

Pork technically only needs to be cooked to an internal temperature of 145 degrees fahrenheit to be safe to eat. However, pernil de cerdo is cooked to much higher temperatures to achieve that buttery, tender texture. Your roast will be ready when it has reached around 200 degrees Fahrenheit. 

Marinade Options for Roast Pork Shoulder

Traditional pernil de cerdo is marinated the day before roasting. Most marinades incorporate sofrito, which is simply a blend of aromatics like onions, garlic, carrots, and peppers sauteed slowly in olive oil. Brazilian sofrito is called “refogado,” and typically uses only onions and garlic.  

Puerto Rican recipes also incorporate adobo, oregano, and some kind of citrus. Our recipe omits the adobo but does benefit from a good squeeze of lime and fresh thyme and rosemary in place of the oregano. 

Pernil de Cerdo Recipe (Brazilian Style Puerto Rican Pork Shoulder)

Ingredients:

One 6 lb pork shoulder, bone in and skin on
2 tbsp refogado
1/4 cup of lime juice
½ cup extra virgin olive oil
1 oz fresh thyme, chopped
1 oz fresh rosemary, chopped
2 tsp kosher salt
Freshly ground black pepper

Directions:

  1. Score the pork, cutting through the skin and slightly into the meat.
  2. Rub the refogado into the scored pork, making sure to get under the skin.
  3. Whisk together the olive oil and lime juice in a bowl. Add in the salt, ground pepper, and fresh herbs.
  4. Pour the marinade over your pork roast in a shallow dish or in a gallon freezer bag. Place in the refrigerator and marinate overnight.
  5. Preheat the oven to 350 degrees Fahrenheit.
  6. Transfer your pork to a roasting pan, skin side down, along with any remaining marinade.
  7. Roast for 3.5 hours, or until the roast has achieved an internal temperature of 195 degrees Fahrenheit (usually about 30-35 minutes per pound). 
  8. When the pork has come to the appropriate temperature, remove it from the oven and flip it so it is skin-side up.
  9. Preheat the broiler to 500 degrees fahrenheit, and return the pork to the oven. Broil until the skin is very crisp.
  10. When the skin is crisp, remove the roast and let it rest for a few minutes. Slice your pernil de cerdo tableside for a dramatic flair. 

More Great Brazilian Recipes to Try:


You´re headed off-site..

Would you like to checkout now?

You're switching shops with items in your cart. Our Gift Card products are sold from a seperate shop than our Butcher Shop & Merchandise products and require seperate checkouts.

If you wish to return to your Gift Card cart, simply navigate back to a Gift Card product page and click the cart icon - if you don't see your products please toggle between our different shopping carts.