PICKUP/DELIVERY Reserve
Reserve Order To-Go

Bacalhau a Bras

Easter Comfort Food

plate of bacalhau a bras, a Brazilian dish made with egg and salt cod

jump to recipe button

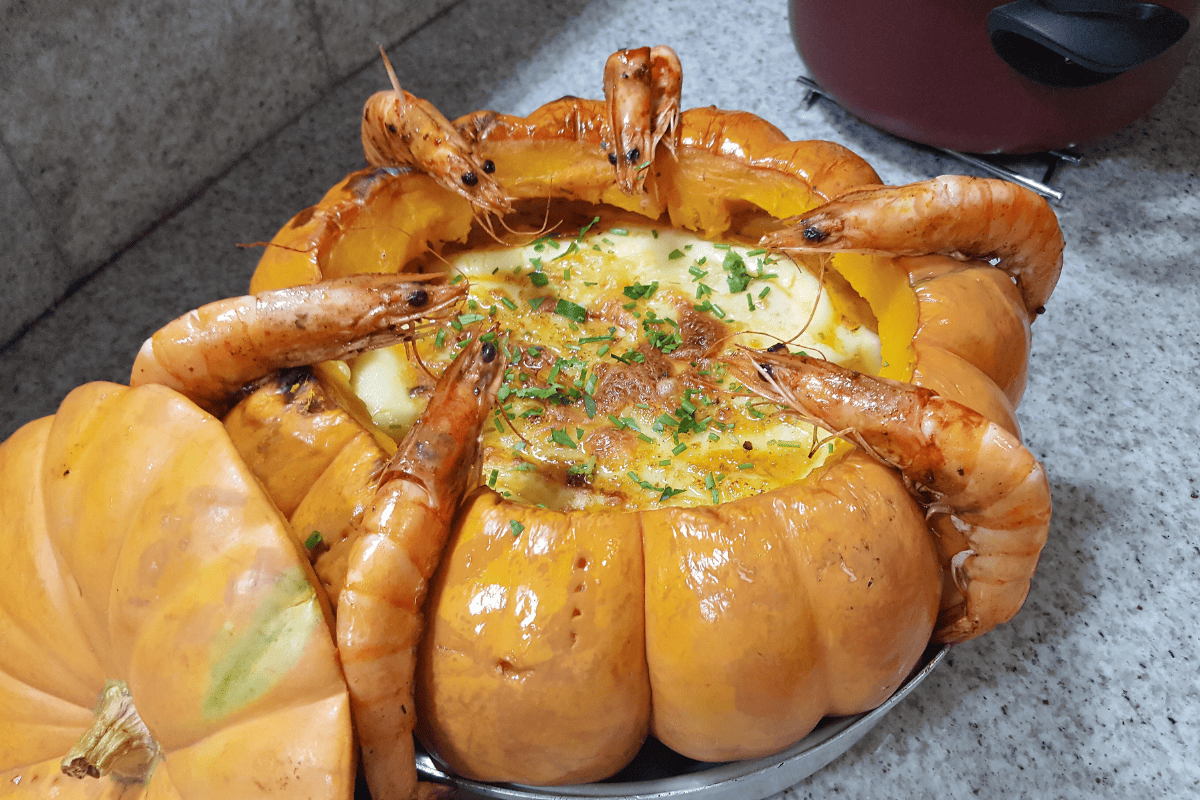
If you like seafood, this Bacalhau à Brás recipe is for you. This traditional dish ties together savory cod with warm, comforting potatoes, often served with any variety of Brazilian sides and garnished with fresh parsley and olives. While the recipe requires significant preparation, this meal is well worth the wait. Bacalhau à Brás is a long-standing tradition in Brazilian culture for Easter brunch, lunch, or dinner. It actually originated in Lisbon in the late 19th century; its founder, of the last name Braz, deserves a round of applause for his accessible, affordable, and delectable invention. 

What is Bacalhau à Brás?

Bacalhau à Brás is a creative and inexpensive recipe: it is a meal anyone can make while still having fun with it. It is a simple dish made with rehydrated salt cod, eggs, potatoes, aromatics, and olives.

Historically, Bacalhau à Brás is remarkable: in an effort to reduce food waste, it is said that chef Braz would use the less meaty parts of the cod which one would usually toss. After deboning the cod, the skin would be removed and the remaining fish shredded. As such, all parts of the fish were put to use. Even the potatoes – traditionally cut in long thin slices – could be made from scraps. 

A household staple, eggs are a perfectly wholesome addition to this lovely Spring meal. The eggs are optional, but they lend a creamy, buttery texture that also binds the fish and potatoes together. 

When Do Brazilians Eat Salt Cod?

Brazilians eat bacalhau all year long, but it is most commonly prepared during the week of Easter, namely on Good Friday. If you are in search of a variation of this recipe but still want the flavor of salted cod, salt cod in cream is a similar dish that is also common during this time of year. 

Bacalhau à Brás is also prepared in countries other than Portugal and Brazil. In historically Roman Catholic countries, recipes with salted cod as the star ingredient gained popularity as the Church forbade the consumption of red meat on all Fridays during Lent, Ash Wednesday, and Good Friday. 

Many cultures have developed their own unique take on meals incorporating the foods they have access to when red meat is not an option, and Bacalhau à Brás is an ideal example of that. 

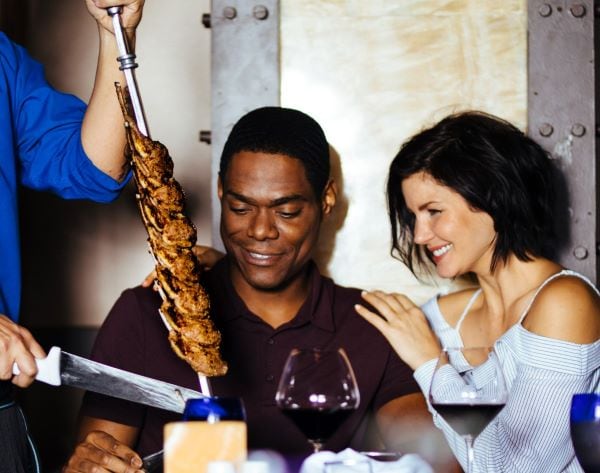
For those anxiously awaiting the days when red meat is back on the menu, be sure to stock up with one of our butcher boxes: premium cuts of beef, pork, and lamb delivered right to your door in time for Easter dinner and the start of grilling season.

Preparing Bacalhau 

Bacalhau à Brás requires some special considerations, mostly to do with preparing the salt cod. You do not want to use it straight out of the package, unless you enjoy a mouthful of straight salt. Prior to use, salt cod needs to be soaked in water for an extended amount of time. This “de-brines” it and also rehydrates it somewhat for better texture.

We recommend soaking your salt cod overnight, but you can get away with a few hours in a pinch. Ideally, you should also change out the water at least once during soaking. Give the fish one final rinse with fresh water before you add it to your bacalhau a bras dish. 

Can You Use Fresh or Frozen Cod for Bacalhau à Brás?

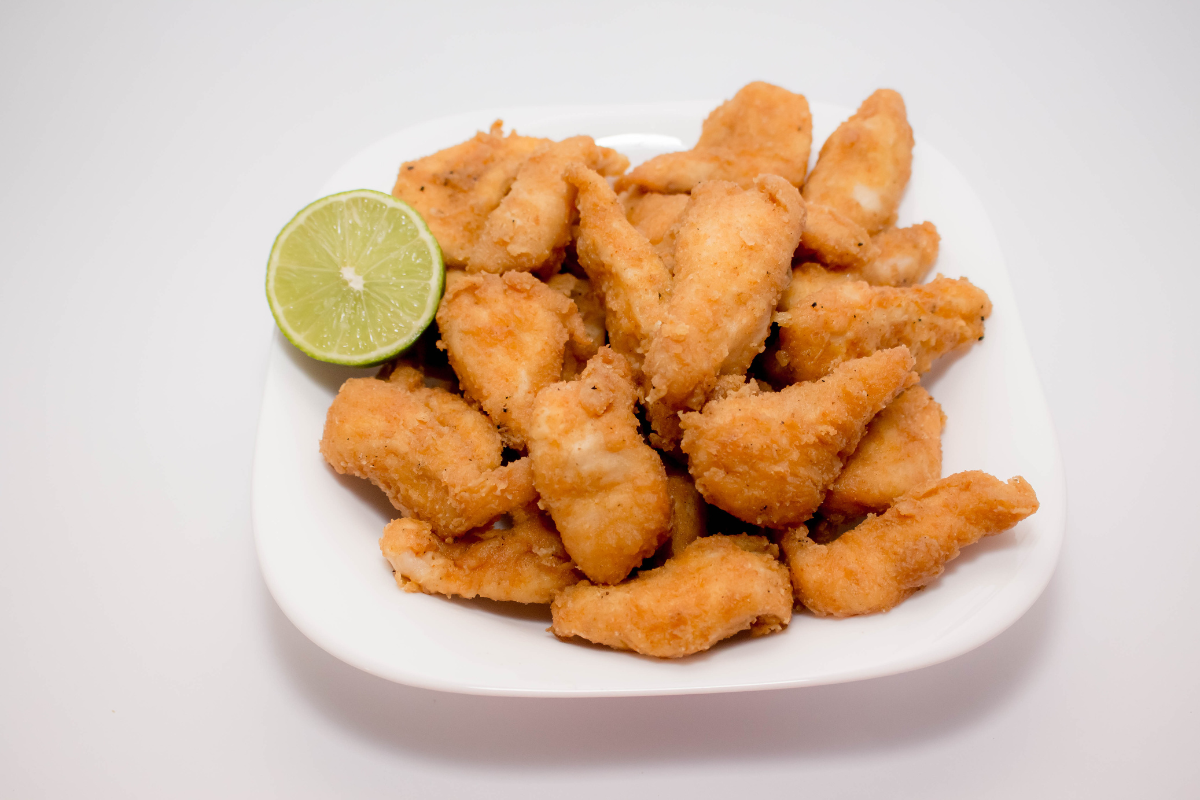
Bacalhau à Brás can be made with fresh or frozen cod, too. If you plan to cook with fresh cod, though, you will need to account for longer cooking time. Salted cod is preserved, which means that it is actually already “cooked” and ready to be thrown into the mixture of flavors as soon as some of the salt has been removed during the soaking process. 

If you are looking for a healthier alternative, using fresh cod will significantly reduce the amount of sodium in the dish. Of course, fresh cod is always preferred, but buying it frozen will do the trick just as well. Just be sure to prepare it according to package ingredients. 

What Do You Serve With Bacalhau à Brás?

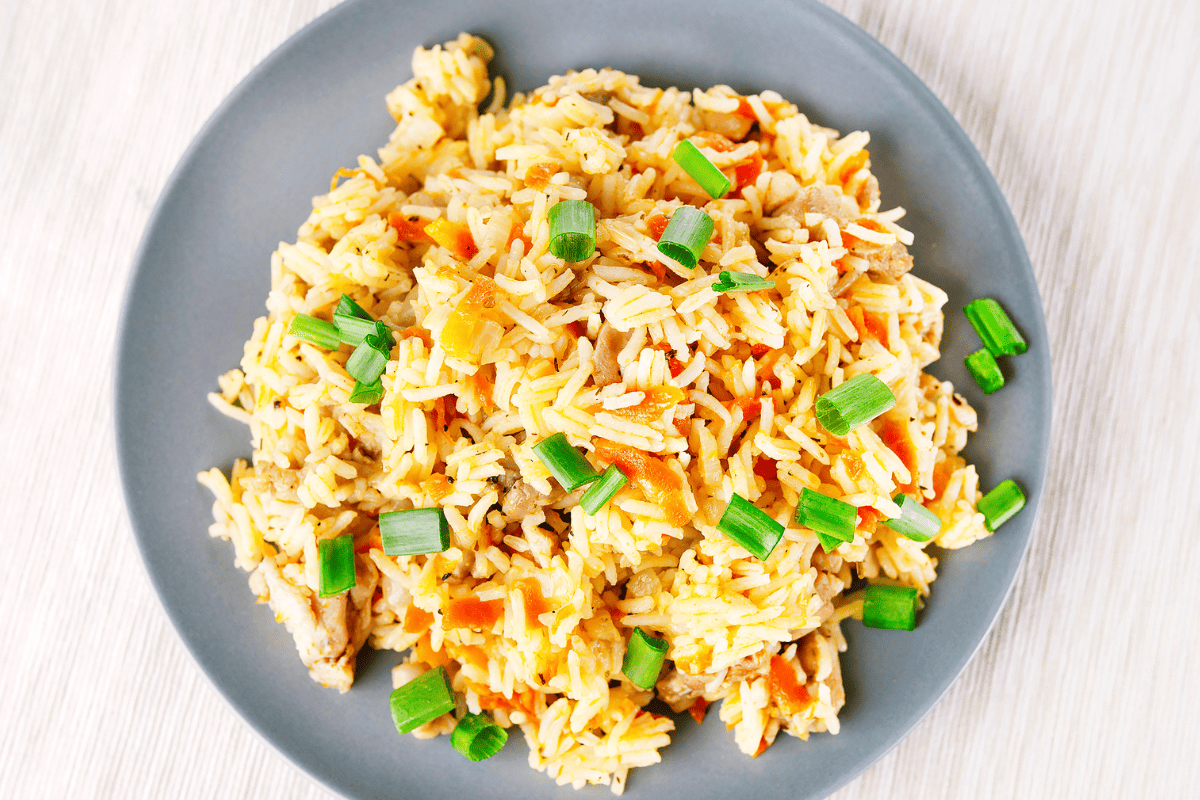
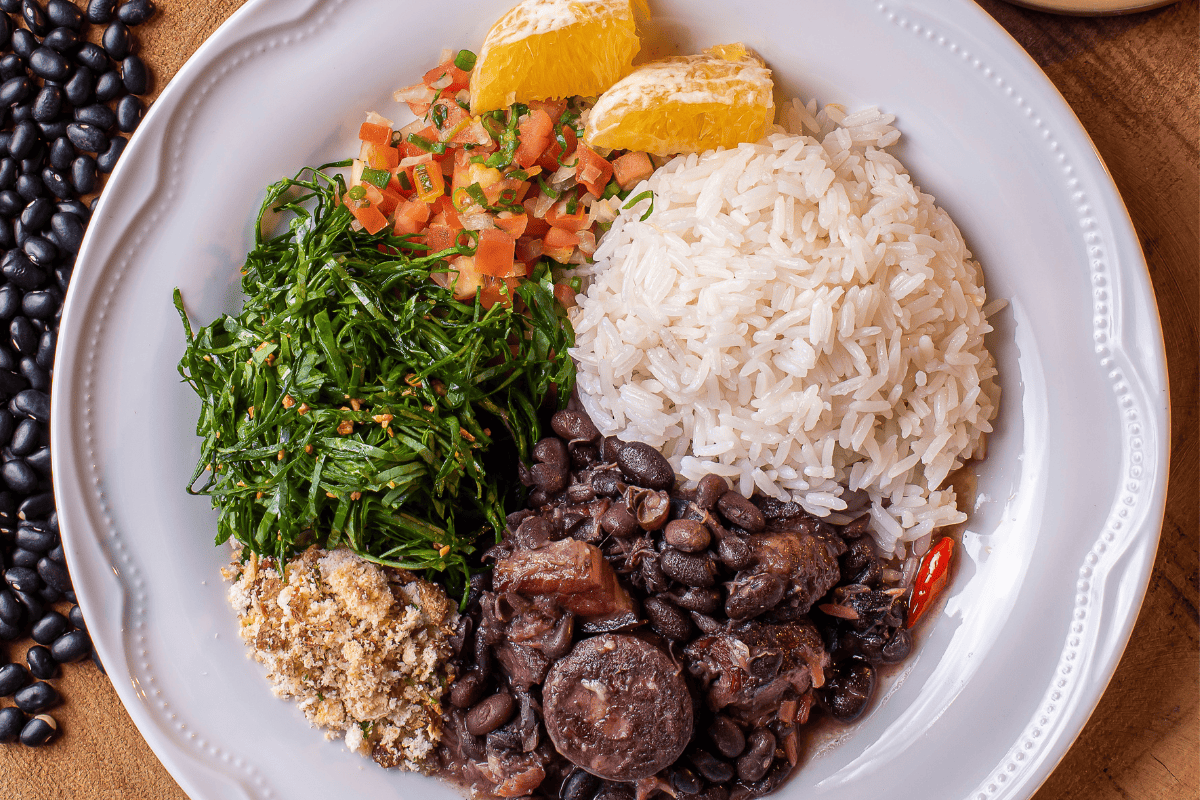
Bacalhau à Brás is plenty hearty on its own, but you won’t often find a meal in Brazil without the ubiquitous, aromatic white rice and feijao with farofa. Bursting with flavor, both of these sides are great options if you are looking to fill a hungry belly. 

Traditional Brazilian white rice calls for lots of garlic paired with onion and some oil to keep the rice loose. Brazilians cook it so often they often prepare a jar of the aromatics ahead of time. This is called “refogado. 

Feijao refers to another traditional and unique side dish which combines black beans simmered with meat trimmings of choice and topped with crisp farofa, a garnish made from nutty, toasted cassava flour. The meat can vary greatly according to taste and region. Brazilian cuisine really allows for creative autonomy; you can add any meat that sounds good to you, be it bacon, Brazilian sausage, beef short ribs, or even pig’s feet. The options with this side dish are endless. 

Bacalhau à Brás Recipe

Ingredients:

3 lbs salt cod, soaked in cold water overnight
2 large yellow onions, thinly sliced in rings or half moons
1 clove garlic, minced
2 bay leaves
2 oz white wine (dry, not sweet)
2 lbs golden potatoes
8 large eggs
¼ cup whole, pitted olives
Extra virgin olive oil
Freshly ground black pepper
Salt, to taste
½ cup fresh parsley + more for garnish

Directions: 

  1. Rinse the pieces of cod with cold water after overnight soaking. Then, place the cod in a large pot with enough water to completely submerge it.
  2. Bring the water to a boil over high heat and reduce the temperature to medium. Let the cod cook for 8-12 minutes, or until the fish is flaky and tender.
  3. Reserve 1 cup of water from the pot and discard the rest. Let the cod cool.
  4. While the cod cools, preheat your oven to 450 F/230 C. Cut your golden potatoes into very thin slices, like matchsticks or shoestring fries. You can leave the skin on or off, depending on your preference.
  5. Put the potatoes on a baking sheet and toss in a little extra virgin olive oil. Season liberally with black pepper and a little salt. Roast until they are golden and crisp (about 25-35 minutes).
  6. While the potato sticks roast, return to the cod. Remove any bones you find along with skin. Carefully shred the cod with your fingers or two forks, then set it aside.
  7. Mix the eggs, some black pepper, and a pinch of salt with a whisk, or beater.
  8. In the same pot you used to cook the cod, heat a drizzle of olive oil over medium heat. Sauté the onions in the hot oil for 4-5 minutes, or until they are translucent. Then add in the garlic and cook for a further 30 seconds or so. 
  9. Add the wine, reserved fish stock, and bay leaves and cook until the mixture has reduced, or for about 2 minutes.
  10. Remove the bay leaves, then add the shredded cod and parsley to the pot, stirring well to combine. 
  11. Add the beaten eggs, stir and cook until they are set, but not scrambled. It should have the appearance of a uniform sauce. 
  12. Combine the fish mixture with your roasted shoestring fries. Transfer it to a serving dish and dot the top with olives and fresh parsley. 

Enjoy!

Easter Brunch Made Easy 

Bacalhau à Brás can just as easily be served for Easter Brunch. After all, it is essentially fish with hashbrowns and eggs! Of course, you can make things even easier on yourself this Easter by visiting one of Texas de Brazil’s 50+ locations. Enjoy our famous salad bar and delectable sides, along with our mouth watering churrasco favorites sliced tableside. Take a look at our menu for more ideas to get busy in the kitchen. 


Hot Chocolate with Condensed Milk

Brazilian Chocolate Quente Cremoso

white mug of hot chocolate

The winter months are in full swing here in the northern hemisphere, which means many of us are scrambling to stay warm or just pass the time on these short days. A cup of something cheerful seems in order, and there is nothing cozier (or more decadent) than a mug of steaming hot chocolate. It’s just the thing when you’re curled up with a good book, watching your favorite show, or just enjoying the winter scenery through your window. Of course, today we are offering a Brazilian spin on this classic beverage: hot chocolate with condensed milk–a must have ingredient for virtually anything sweet in Brazil. 

Is Hot Chocolate with Condensed Milk Thick?

Well, yes. Hot chocolate with condensed milk will naturally be thicker than if you had made it with just milk. It is still perfectly sippable and, in our opinion, that extra thickness only lends to the velvety texture and rich taste. 

That being said, if you prefer your hot chocolate a little thinner, you can always lessen the amount of condensed milk that you use. Much of the sweetness in this recipe is derived from the condensed milk, however, so you may need to add a little sugar or more semisweet chocolate to make up for it. 

Hot Chocolate vs Hot Cocoa?

Although the terms are often used interchangeably, hot chocolate and hot cocoa are not the same thing. Both use a base of milk or sometimes water, but hot chocolate uses melted chocolate morsels or chopped bars, and hot cocoa uses cocoa powder. 

This recipe for hot chocolate with condensed milk is, technically, a hybrid. We are using both bittersweet chocolate bits and a little cocoa powder. In our opinion, the blend reins in the texture and keeps the taste from being too cloying. 

Can You Use Water in Hot Chocolate with Condensed Milk?

Sure. You can replace the whole milk in this recipe with water if you want a healthier option. But then again, it’s hot chocolate–it’s meant to be indulgent! We strongly suggest going no leaner than 2% milk in this recipe. Water simply doesn’t have the same creamy, slightly sweet profile as milk. 

What Spices/Toppings for Hot Chocolate?

You don’t need to add anything to this recipe, but if you want to spice up your hot chocolate with condensed milk, there are plenty of options. A dash of cinnamon never goes amiss. You could also add a smidge of peppermint extract or even orange, if you like that combo. Have fun with it. Some other fun toppings and additions might include:

  • Whipped cream
  • Crushed candy canes/peppermint
  • Chocolate sprinkles
  • Mini marshmallows or a dollop of marshmallow cream
  • Peppermint schnapps for the adults
  • Bailey’s or other coffee liqueur 
  • A splash of spiced rum or aged cachaca

Recipe for Creamy Hot Chocolate with Condensed Milk 

Ingredients:

4 cups whole milk
14 oz sweetened condensed milk (one can)
¼ cup unsweetened cocoa powder
4.5 oz semisweet chocolate, chopped or in morsels
½ tsp Vanilla extract

Directions:

  1. In a large saucepan, heat the milk and sweetened condensed milk over medium heat. When it begins to slowly simmer, stir in the cocoa powder. Next, add in the chocolate a little bit at the time, stirring in between each addition to allow it to melt. 
  2. Continue stirring the mixture over medium heat until all of the chocolate has melted and you have a smooth, creamy mixture. 
  3. Remove your Brazilian hot chocolate from the heat and stir in the vanilla extract. 
  4. Serve hot in mugs with your favorite toppings and garnish. 

More Great Brazilian Recipes to Try

Frango a Passarinho (Brazilian Fried Chicken)

frango a passarinho, brazilian fried chicken, piled on a white dish with a lime wedge garnish

Nearly every culture has a version of battered and fried chicken. From katsu in Japan to pollo frito in Italy, the combination of juicy chicken coated and a crunchy crust is a universal favorite. No surprise, then, that Brazil has its own version of fried chicken: frango a passarinho. It is a staple in the bar scene but is just as delicious when enjoyed at home. 

What is Frango a Passarinho?

Frango a passarinho has a somewhat comical English translation: “chicken like a little bird.” The name is a reference to the bite sized pieces that are used. A whole roasting chicken is reduced to mini morsels; you are effectively making a “little bird” from the bigger bird, or chicken. It’s probably best not to think too much about it. 

When Do Brazilians Eat Frango a Passarinho?

Brazilian fried chicken is often featured on petiscos menus. Petiscos are simply the Brazilian version of tapas–small dishes meant to be shared with friends at a crowded boteco, or bar. Brazilians will often make a night of it, socializing and wandering from bar to bar, enjoying frequent little bites to help insulate against the inebriating effects of alcohol. (Check out our recipe for montaditos for another petisco favorite.)

Do You Have to Use a Whole Chicken?

No, in fact our recipe for frango a passarinho uses only wings and drumettes. Traditional recipes often call for chopping up a whole chicken into tiny pieces–.even the wings are divided into two or three pieces. We’re of the opinion that this is a) too much work and b) too little reward per piece, especially when navigating around bones. Furthermore, the dark meat of the wings and drumettes is less prone to drying out than breast meat, which means you can get a crispier crust without overcooking them. 

Do You Marinate Frango a Passarinho?

Yes, a simple marinade of garlic, lime juice, salt, and pepper is used to pump up the flavor and texture of your Brazilian fried chicken. We also like to add a little brown sugar for sweetness and some fresh, chopped cilantro for an herbaceous kick. You only need to marinate the chicken for an hour, but overnight will be ideal. 

Recipe for Brazilian Fried Chicken (Frango a Passarinho)

Ingredients:

2 lbs chicken wings and drumettes
4 cloves garlic, finely minced
Juice of 2-3 limes (four tablespoons)
2 tsp salt
Freshly ground black pepper
½ cup chopped cilantro
2 tbsp brown sugar
1.5 cups flour
Vegetable oil for frying
Chopped cilantro and lime wedges for garnish

Instructions:

  1. In a large bowl, whisk together the minced garlic, lime juice, 1 tsp salt, black pepper, brown sugar and cilantro. Toss in the chicken and stir until evenly coated, then let it marinate in the fridge for at least 1 hour.
  2. Heat vegetable oil in a deep fryer or large, deep skillet to 350°F (175°C).
  3. While the oil is heating, prepare your flour mixture: mix the flour, 1 tsp of salt, and a few grinds of black pepper in a shallow container. 
  4. Add a few pieces of chicken to the flour mixture and roll to coat. Shake off any excess and transfer the chicken to a tray or dish. Repeat until all the chicken has a nice dusting of flour.
  5. Place half the chicken carefully in the hot oil and cook until crisp and golden brown and they reach an internal temperature of 165 degrees fahrenheit. This should take around 10-12 minutes. Transfer the chicken to a cooling rack lined with paper towels. Repeat this process with the rest of the chicken.
  6. Add a squeeze of lime over the finished chicken and garnish with fresh cilantro and lime wedges. 

Tips for Extra Crispy Brazilian Fried Chicken

  1. Make sure the oil is the right temperature. Oil that is too hot will result in a burnt crust and raw chicken. By contrast, oil that is too cold can result in a soggy crust that is too oily and pale in color.
  2. Fry the chicken in batches. Overcrowding the pot will drop the oil temperature and cause uneven cooking.
  3. When dredging the chicken in the flour mixture, press the pieces into it with a good amount of force. This helps the mixture stay onto the chicken when frying. 

Brazilian Food Catered

Getting back to the grind for 2024? Why not start the year in style with Texas de Brazil’s catering service? Delicious churrasco meats and our famous side dishes brought right to your office will set the mood for a productive and motivated new year. Our dishes are slow-roasted, so please give us at least 5 hours to prepare your perfect meal. Go online to place an order today. 

Pumpkin Fudge (Brigadeiros com Abobora)

pumpkin fudge balls (brigadeiros) with cinnamon sugar dusting

Brigadeiros are a popular sweet treat in Brazil similar to American fudge. With Halloween fast approaching, most of us here in the US are indulging in all things pumpkin spice, from lattes to donuts. But what about pumpkin fudge? It’s so easy to make and the creamy, indulgent sweet flavor is a perfect canvas for pumpkin. Skip the complicated pies and breads and make a batch of pumpkin fudge balls instead for your next Fallget-together.

Pumpkin Fudge vs Brigadeiros

We are technically making pumpkin brigadeiros today, not fudge. Both utilize condensed milk as the main sweetener and thickener. The main difference is the shape and texture. Brigadeiros are rolled into balls, as opposed to the cut squares of traditional American fudge. They are also softer than fudge, since they typically omit ingredients like chocolate chips in favor of cocoa powder or other non-hardening ingredients, like coconut milk and butter.

The cooking time is also different for brigadeiros vs pumpkin fudge. Fudge requires minimal heat, just enough to melt the ingredients together. For brigadeiros, the condensed milk and other ingredients must be cooked and stirred continuously for up to fifteen minutes to fully thicken the mixture. 

Do Brazilians Even Like Pumpkin Fudge?

You may be wondering about the authenticity of this recipe. After all, most Brazilians do not celebrate Halloween, which is the driving force behind many American Autumn traditions (including all things pumpkin spice).

Likewise, Brazilian Fall does not occur during October, but during our spring months (March-May). So the chilly temperatures we associate with the ever-divisive pumpkin spice latte are irrelevant during the same time period in Brazil. 

So the question is: do Brazilians even like pumpkin sweets, like fudge or brigadeiro? We would say, “yes!” Sweets and new flavors never go amiss in Brazil, and there are plenty of national savory dishes that already incorporate pumpkin. So it seems only natural that a sweet pumpkin dish would be appreciated.

Tips for Pumpkin Fudge Balls

There are a few things you can do to make assembling your round pumpkin fudge/brigadeiros easier:

  1. Don’t Over/undercook: the first step  is to make sure you do not undercook or overcook your mixture. If undercooked, the “dough” will be too soft to roll into balls; overcooked, and it will harden to the point that you can’t scoop any out to roll. 
  2. Grease your hands: coat your hands in a little softened butter as you roll your pumpkin fudge balls. This will keep them from sticking to your palms and fingers.
  3. Adequately chill: chill the dough just long enough to harden, but not so long it becomes impossible to scoop. One hour should be sufficient. 

Storing Pumpkin Fudge

You can make pumpkin fudge balls ahead of time. They will keep well for a week or so stored in a container with a lid. You can also freeze them, but it is better if you just freeze the mixture rather than the fully assembled brigadeiros. If you do want to freeze the individual balls, avoid the sugar dusting until ready to serve. It will absorb into the frozen balls, affecting their texture. 

Pumpkin Fudge Balls Recipe (Brigadeiros com Abóbora)

Ingredients:

For the fudge:

One 14 oz can sweetened condensed milk
1 tablespoon unsalted butter
2 oz pumpkin puree
¼ tsp ground cinnamon
⅛ tsp ground cloves
⅛ tsp ground ginger
⅛ tsp ground nutmeg
20 mini cupcake liners

For the coating:

¼ cup raw sugar
tsp cinnamon

Directions:

  1. Combine the condensed milk, butter, pumpkin puree, and spices in a saucepan and stir over medium heat. You will need to stir constantly to avoid the mixture burning. When the mixture begins to bubble lightly, keep stirring until you can drag the spoon along the bottom of the pan and see it clearly for a few seconds. This should take around fifteen minutes. 
  2. Transfer the mixture to a plate or bowl and refrigerate for one hour.
  3. Mix your raw sugar and cinnamon together and put it in a shallow dish or tupperware for easy coating. 
  4. Remove the hardened pumpkin fudge from the refrigerator. Butter your clean hands and scoop a small amount of the fudge and roll into a bite-sized ball. Roll the ball in the cinnamon sugar, then place in a candy cup. Repeat until you have used up all of your mixture. 
  5. Serve immediately or chill for up to four days before guests arrive. 
  6. Serve with hot coffee or a mug of quentao de vinho

More Delicious Brazilian Recipes to Try:

Chocolate Orange Cake (Bolo de Laranja)

chocolate orange cake

Orange season is fast approaching, and we can’t wait. There is nothing better than the refreshing bite of a ripe navel orange, or a glass of freshly squeezed juice. Oranges also lend themselves nicely to a variety of recipes, both sweet and savory. Today, they are the star of a truly special dessert: chocolate orange cake. 

Brazilian Chocolate Orange Cake

Strictly speaking, this is not a traditional recipe. The original recipe is from Portugal, where it is known as bolo de laranja. The Portuguese climate is especially conducive to growing oranges and other citrus, so many national dishes incorporate these fruits. Recipes vary, but orange cake is oftentimes a sheet or bundt cake eaten on Sundays during Lent. A light dusting of powdered sugar is the finishing touch. 

Brazilians (famous for their sweet tooth) prefer an orange-infused syrup to soak into the finished cake, which is also baked in a bundt or tube pan. We are taking it one step further and making a chocolate ganache to drizzle over the orange cake. 

You may find recipes for bolo de laranja that call for beaten egg whites. This gives the cake an extra lift and a crisper texture. You can certainly do this, but we are feeling lazy and are opting to get our rise through oil, baking powder, and baking soda. 

Oil vs Butter for Bolo de Laranja

You can use butter or oil for your chocolate orange cake, but we recommend oil. Oil tends to produce a more moist, even crumb than butter. This is not only important for mouth feel, but also for presentation when you slice into the cake. You won’t have any pieces crumbling away when you serve this cake. 

If you do wish to use butter, you can use the same amount of melted butter as you would oil. When using solid butter, you will need to use 25% more in volume. Our recipe today calls for ½ cup of oil, so you would use ⅔ cup of butter or other solid fat. 

Ganache for Chocolate Orange Cake

Ganache is simply chocolate slowly melted with cream. The ratio of cream to chocolate for your orange cake will depend on the type you use. In general, dark chocolate (semi-sweet) calls for a 1:1 ratio of chocolate to cream; milk chocolate requires slightly less cream, usually 1 part of cream to two parts of chocolate. 

We recommend the semi-sweet ganache for the bolo de laranja. It is already quite sweet, so the slightly bitter taste of the chocolate helps to off-set that. Plus, the appearance of the glossy dark chocolate makes it a real show-stopper. 

Feel free to add in a little boozy flavor to the ganache as well. We’re adding a splash of Grand Marnier to suit the orange theme, but a little spiced rum would do nicely, too. 

Fresh Orange Juice vs Bottled for Bolo de Laranja

Of course, we are going to recommend fresh squeezed orange juice for this recipe; and with navels coming into season soon, there is no reason to go store bought, in our opinion. Not only is the flavor unparalleled, you will benefit from the antioxidants and enzymes that are destroyed during the bottling process. 

That being said, if you don’t want to squeeze it yourself or you don’t have a good supply of fresh oranges near you, bottled will be fine. Just choose a version with pulp and no added sugar. 

Chocolate Orange Cake Recipe (Receita de Bolo de Laranja com Chocolate)

Ingredients:

For the Cake Batter:

2.5 cups AP flour
½ tsp salt
1 tsp baking powder
½ tsp baking soda
½ cup extra virgin olive oil
3 large eggs
1 cup orange juice
2 cups white sugar
For the Ganache:
9 oz bittersweet chocolate chips or roughly chopped bars
1 cup heavy cream
1 tbsp Grand Marnier

Directions:

  1. Preheat the oven to 350 degrees Fahrenheit. 
  2. In a medium bowl, whisk together the baking powder, baking soda, salt, and flour. 
  3. In the bowl of a stand mixer, add in your eggs, sugar, and olive oil. Mix on low until combined. Add in the orange juice, and mix again until blended.
  4. Add in your sifted dry ingredients and mix on low until just combined. Try not to over-mix.
  5. Grease a bundt pan with non-stick spray or butter and a coating of flour. Pour the cake batter into the pan and place in the center of the oven. 
  6. Bake for 40 minutes, or until a knife inserted into the batter comes out clean.
  7. Turn the cake out onto a serving tray and let it cool for at least an hour.
  8. When the cake is cool, make your ganache. Heat a double boiler over medium-high heat and pour in the cream. Let it heat for a couple of minutes, then add in the chocolate. Stir constantly over the heat until the chocolate is melted and the mixture is glossy. Finally, whisk in your Grand Marnier. 
  9. Drizzle the ganache over the top of the cake. Garnish with fresh orange zest and a few fresh orange slices. 

Storing Chocolate Orange Cake

Your bolo de laranja com chocolate will keep under a cake dome or in a storage container at room temperature for two days, and up to ten in the fridge.  

More Great Brazilian Recipes to Try:

The Best Date Night Restaurants Have Churrasco

Couple at Table

When it comes to planning a memorable and romantic date night, choosing the right restaurant is key. You want a place that not only offers delicious food but also creates a warm and intimate ambiance. You might also want something fun and unique. Luckily, Texas de Brazil ticks all those boxes and more. Read our article to discover why we think the best date night restaurants include churrasco, a bustling atmosphere, and unparalelled service. 

Date Night Restaurants Should Have Great Food (Obviously)

It goes without saying that a good date night spot should have delicious food. But we take it one step further by presenting said delicious food in a truly unforgettable manner. 

One of the top reasons why Texas de Brazil tops our list for best date night restaurants is its unique dining concept. We are a churrascaria-style restaurant: you’ll be treated to an all-you-can-eat feast of flame-grilled meats, cooked to perfection and served right at your table. Our expertly trained gauchos will bring skewers of succulent, sizzling meats, including beef, lamb, chicken, and pork, and carve the best morsels directly onto your plate. 

The gauchos, by the way, are an integral part of Texas de Brazil’s lively atmosphere. Wearing traditional dress (minus the deadly facón) and whirling around the tables with their loaded silver skewers, you are instantly transported to the authentic churrascarias of Brazil. A touch of whimsy and cultural immersion never killed the mood, did they?

A Date Night Option Should Have…Options

The best date night restaurants should also have variety. While the meats are the main attraction, Texas de Brazil’s gourmet salad bar is a delightful complement to the experience. It features a wide array of fresh vegetables, cheeses, charcuterie, and other delectable items. This is not your average salad station: it’s an opulent selection of appetizers and sides that can please even the most discerning palates. 

The salad bar is also flanked by our hot side dish offerings, including our famous feijoada (black bean stew), silky lobster bisque, and fluffy jasmine rice. Your gaucho will bring other sides directly to your table, the most important of which are the chewy, melty Brazilian cheese bread bites.

The Best Date Night Restaurants Facilitate Conversation 

Sharing is an essential ingredient in any successful date night. Texas de Brazil encourages a communal dining experience, making it ideal for couples. You can indulge in the various meat and salad bar selections together, savoring each bite and discussing your favorites. The process of selecting and trying different cuts of meat creates a sense of adventure and togetherness that enhances the romantic atmosphere.

A Cozy and Intimate Atmosphere is Crucial

Texas de Brazil takes great care to create a romantic atmosphere without too much pressure. The dimly lit dining area, comfortable seating, vibrant decor, and attentive staff all contribute to a cozy and intimate ambiance. And while it is certainly a high end dining experience, it never feels overly posh or stuffy. You are just as welcome in jeans as you are in a tuxedo.  

We think the best date night restaurants should want to help you celebrate your romance with free tokens for special events. If it happens to be your birthday or anniversary, for example, let your gaucho know so he or she can help make the night even more special. Also, be sure to sign up for Texas de Brazil’s eClub. It’s free, and you’ll receive a gift when you choose to celebrate your milestone with us. 

Extensive Wine and Cocktail Selection

No romantic dinner is complete without the perfect drink to accompany your meal. Texas de Brazil offers an extensive wine list that includes a variety of reds and whites to suit your tastes. Of course, we also serve delicious cocktails to pair with your dinner. A passion fruit caipirinha never goes amiss on a date night. 

Night-In Options

Sometimes, the best date night restaurant is your own kitchen. Cooking for someone is a wonderfully romantic gesture, especially if you have high quality ingredients. Texas de Brazil’s online butcher shop lets you select from hand-curated butcher boxes or choose your own items a la cart. The finest cuts of lamb, beef, and pork are delivered right to your door, ready for you to grill, roast, and sear. A proper steak dinner, a glass of wine, and your favorite Netflix show sounds like a more than acceptable plan to us. 


Stuffed Pumpkin Recipe (Camarao na Moranga)

Brazilian stuffed pumpkin with shrimp stew

Camarao na moranga is another favorite recipe at Christmas time in Brazil, where pumpkins are available year round. In the US, however, pumpkins mean one thing: Fall. This is a perfect meal to eat on a chilly Autumn evening. Not only that, its presentation is beyond compare: creamy shrimp soup in a real, roast pumpkin shell. Trust us, you won’t want to miss trying this stuffed pumpkin recipe this Fall. 

What Pumpkins are Used for Stuffed Pumpkin Soup?

Brazilians use a species of pumpkin called a moranga for this stuffed pumpkin recipe. The American equivalent would be a Cinderella pumpkin-the whimsical, somewhat squat pumpkins with a deep orange color. They are great for roasting and have a sweet, caramelized flavor when roasted. 

Interestingly, the origins of this stuffed pumpkin recipe in Brazil are as fairytale-esque as Cinderella herself. It is said that the first morangas were planted by Japanese political prisoners at the Presídio da Ilha Anchieta penitentiary.

Apparently, the conditions were quite unsanitary, leading many of the prisoners to contract worms. They refused Western medicine in favor of traditional remedies, which included pumpkin seeds. Local Brazilians became intrigued by the supposed remedy, and began buying the extra pumpkins planted at the prison. 

A trader carrying the pumpkins into a nearby town hit a rough patch of roadway, causing one of the pumpkins to roll off and into the sea. Miraculously, the pumpkin washed up on shore. Very coincidentally, the pumpkin was picked up by a seaside chef. When she opened it, it was supposedly full of shrimp. She was inspired to cook the shrimp inside and serve it in the hollowed out gourd. Thus, the first stuffed pumpkin recipe was born. 

This wild story is fun to tell and imagine. The only thing verifiable about it, however, is the general timeline and location when the stuffed pumpkin recipe known as camaro na moranga first appeared: in the 1940s in Sao Paulo. 

Squash Alternatives for Stuffed Pumpkin

While Cinderella pumpkins are typically used in the traditional Brazilian stuffed pumpkin recipe, other varieties of squash will do. Acorn squash, buttercup squash, and sugar pumpkins work well, especially if you want to make individual portions. If you want a slightly larger pumpkin “bowl,” you can also use Kobocha squash

What Type of Shrimp for Camarao na Moranga?

For your shrimp stuffed pumpkin recipe, you’ll want to use medium or large shrimp. This ensures everyone gets a generous helping of shellfish in every portion. White or pink shrimp is fine. Be sure to use either very fresh shrimp or opt for frozen, if you doubt the quality of the fresh shrimp. 

Brazilian Stuffed Pumpkin Recipe (Camarao na Moranga)

Ingredients:

One large Cinderella, kabocha, or other round roasting squash (8 lbs is good)
1 large onion, diced
3 cloves garlic, minced
Extra virgin olive oil
Kosher salt
1 fresh lime
Freshly ground black pepper
1 can stewed tomatoes
2 tbsp all purpose flour
1 cup fish stock
1/2 cup unsweetened coconut milk
2 lbs medium or large shrimp (raw/thawed, deveined, heads and tails discarded)
Fresh parsley
3 oz grated parmesan cheese
8 oz Brazilian cream cheese (you can substitute American)

Directions:

  1. Roast the pumpkin: Preheat the oven to 350 degrees Fahrenheit. Scoop out all the seeds and pulp. Season the inside of the pumpkin with a drizzle of olive oil, salt and black pepper. 
  2. Replace the top of the pumpkin and wrap the whole gourd in foil. You might need a separate piece to cover the stem. Roast for 45 minutes.
  3. While the pumpkin cooks, heat a large saucepan over medium-high. 
  4. Meanwhile, season the shrimp with salt, pepper, and a squeeze of fresh lime juice.
  5. Add a drizzle of oil to the hot saucepan. Sear the seasoned shrimp for a couple of minutes on each side, then remove. Be sure to reserve any juices produced by the cooked shrimp.
  6. Reduce the temperature to medium and add another drizzle of olive oil. Add in the chopped onions and cook for 2-3 minutes. Then add in the minced garlic and cook for a further 30 seconds or so.
  7. Add in your two tablespoons of flour and mix with the oil to form a rue. Cook for 30 seconds to eliminate the flour taste. 
  8. Slowly pour in your fish stock, whisking constantly. Bring the mixture to a boil to allow it to thicken fully, then reduce heat to medium. As it simmers, stir in the tomatoes and coconut milk. 
  9. Now, stir in the cooked shrimp. Let it warm through for a minute. 
  10. If you haven’t removed the pumpkin, do so now. Leave the oven on 350 degrees Fahrenheit.
  11. Carefully mop up any pumpkin juice with a paper towel. When the pumpkin is dry and cool enough to touch, spread the cream cheese all over the inside. 
  12. Now, ladle in your shrimp stew until the pumpkin is filled to the top. Sprinkle it with the parmesan cheese, and put it back in the oven (uncovered).
  13. Bake for 15-20 minutes, until the top has formed a golden crust.
  14. Garnish with fresh parsley. 
  15. Serve this stuffed pumpkin recipe over Brazilian rice. Be sure to scoop out a little pumpkin flesh with each spoonful. The combination of shrimp stew and fresh roasted pumpkin is a match made in Heaven. 

More Great Brazilian Recipes to Try:

Greek Rice Pilaf (Arroz a Grega)

Greek rice pilaf with carrots and spring onions

Arroz a Grega, or “Greek rice pilaf,” is a popular side dish in Brazil, especially at Christmas time. Despite the name, it is not, necessarily, Greek. There are disputes as to the origin of the dish and its name. Regardless, the general recipe incorporates traditional methods for cooking pilaf-style rice, while incorporating a few quintessentially Brazilian ingredients. 

What is Rice Pilaf?

Pilaf, in general, refers to a style of cooking long-grain rice. It usually involves toasting the rice in oil with aromatics, like onions and garlic, then simmering the rice in a flavorful broth with various proteins (lamb, chicken, fish, etc.) The result is a hearty dish with rice granules that are individual, not sticky like jasmine rice or creamy like risotto. 

Where Does Rice Pilaf Come From?

Although rice had already been in cultivation for thousands of years, the earliest recipes for rice pilaf were written in the 10th century.  The famed Persian philosopher and physician, Ibn Sina, included various recipes in his medical texts, describing the benefits of different ingredients. In Iran, he is still referred to as the “Father of Pilaf.”

This does not mean that pilaf did not exist in some iteration prior to this date. There are accounts, for example, of soldiers in Alexander the Great’s army (4th century BC3) eating “pilav,” and bringing the recipes home from Central Asia to Macedonia. 

The name itself has two derivatives. “Pilaf” is used predominantly in North America. It is derived from the Turkish pilav, which comes from the earlier Persian pilāv. British and Commonwealth nations refer to the dish as pilau, also Persian in origin and possibly Urdu, where the word pulāv indicates a dish of rice and meat cooked together. 

While the exact roots of the dish remain a mystery, it seems we can assume (based on the name and documentation) that the first pilafs came from the Middle East and surrounding regions. As trade routes expanded and cultural exchange flourished, rice pilaf made its way to various corners of the world, where it adapted to local ingredients and cooking techniques. 

Global Variations of Rice Pilaf

Caribbean Pelau: Eastern Caribbean recipes call for various local ingredients, like peas, pumpkin, and corn, along with pieces of chicken or cured pig’s tail. Other parts of the Caribbean add coconut milk and seafood, like crab meat.

South Asian Biryani: this dish originated with the Muslims of South Asia. It combines basmati rice with marinated meat (usually chicken, lamb, or shrimp) and a blend of aromatic spices, creating a rich and savory dish. Vegetarian versions with vegetables or paneer are also popular. In India, a dish called “pulao” also exists, but it is made with lentils and vegetables. Bengali pulao is more traditional, with saffron and long-grain rice. 

Central Asian Plov: In countries like Uzbekistan and Tajikistan, plov (or pilaf) is a staple dish made with long-grain rice, lamb or beef, garlic, and onion. It is usually seasoned simply with salt, pepper, and cumin, although other herbs and spices may be added regionally. 

Lithuanian Plovas: in addition to rice and vegetables (usually carrots, tomatoes, and/or mushrooms), plovas may contain chicken or pieces of pork derived from around the neck or stomach of the animal.

Arroz Grega in Brazil

In Brazil, rice pilaf is a staple item on the Christmas dinner table. The Brazilian version of rice pilaf, known as “arroz à grega,” showcases the country’s diverse culinary influences.

“Arroz à grega” translates to “Greek-style rice,” but it reflects a fusion of international flavors. This dish typically features white rice cooked with a medley of colorful vegetables like bell peppers, peas, and carrots. It’s often seasoned with olive oil and sometimes enhanced with raisins and cashew nuts for a touch of sweetness and crunch.

The vibrant colors and flavors of “arroz à grega” make it a festive addition to the Brazilian Christmas feast, providing a harmonious balance to the ubiquitous Chester hen and hearty stews that often take center stage during the holiday season. 

Why is It Called Greek Rice in Brazil?

No one really knows. While the Greeks do have their own version of pilaf rice, it is not, technically, a Greek dish. Furthermore, the Greek rice pilaf in Brazil incorporates ingredients not commonly found in Greek and other Baltic versions-namely, carrots and bell peppers. Either way, the name “arroz a Grega” has stuck, and indicates a specific Brazilian side dish simmered in broth with vegetables and raisins. 

Best Rice for Brazilian Greek Pilaf

Like traditional Brazilian rice, arroz a grega uses long-grain rice. This is important: long-grain rice has less starch, which keeps the granules from sticking to each other. You can use short-grain rice if that is what you have, but it will be harder to achieve the desired pilaf texture. 

Arroz Grega Recipe (Brazilian Rice Pilaf)

Ingredients:

2 cups long grain rice, such as Basmati
1 tbsp extra virgin olive oil
1 oz unsalted butter
1 yellow onion, finely diced
1 red bell pepper, diced
1 yellow bell pepper, diced
1 cup sweet green peas (fresh or frozen)
2 cloves garlic, minced
1 carrot, peeled chopped
¼ cup golden raisins
1 tsp red chili flakes
1 tsp ground cumin
3 cups chicken stock
2 tsp salt (more to taste)
Freshly ground black pepper
Diced spring onions for garnish (optional)

Directions:

  1. Rinse the rice until the water runs clear, then set aside.
  2. Heat a large skillet or pot over medium. Add in a drizzle of olive oil and the butter, then sautee the bell peppers, onion, peas, and carrots for 3 minutes or so. 
  3. Add in the minced garlic and cook for a further 30 seconds.
  4. Stir in the rinsed rice, and toast it in the oil and aromatics for 2-3 minutes. 
  5. Season with salt, pepper, cumin and chili flakes.
  6. Add in the chicken stock and bring the rice mixture to a boil, then reduce the heat to a simmer.
  7. Cover, and cook for fifteen minutes, or until the liquid has been absorbed. 
  8. Stir in the golden raisins and let them warm through. Taste for salt, and add more, if needed.

Serve piping hot alongside your favorite main course, like a delicious roast picanha or churrasco steak. Garnish with fresh spring onion slices. 

Visit Texas de Brazil for Authentic Brazilian Food

Texas de Brazil is a dining experience like no other. From our mouthwatering, all you can eat churrasco meats, to our enormous salad bar, there is something for everyone to love at our restaurants. Now, you can experience the taste of Texas de Brazil at home with one of our premium butcher boxes: the highest quality cuts of beef, lamb, pork, and sausage delivered right to your door. Go online to order a la carte or a hand-curated box for your next cookout. 


Back to Basics: Perfect Brazilian Rice

Brazilian rice with feijoada, collards, and orange slices

Garlicky Brazilian White Rice Side Dish

Along with black beans (feijao), white rice is the most common side dish in Brazil. It is prepared in a signature way that ensures the grains remain loose, not sticky. It is a simple but satisfying dish that compliments virtually every meal. Don’t let its simplicity fool you, though. There are a few key steps you must take in order to prepare the perfect Brazilian white rice. Not to worry: we’ll share our go-to recipe for flavorful, fluffy arroz Brasileiro so you get it right every time. 

History of Rice in Brazil

There is evidence that rice was cultivated by the indigenous peoples of the Amazon nearly 4000 years ago. Archaeologists believe these prehistoric groups developed a method for manipulating and reproducing wild rice. Unfortunately, this method was lost, likely due to the fact that the indigenous people were decimated by early colonists. 

In an ironic turn of events, Portuguese colonists in the 17th century began to experiment with rice cultivation in Brazil. The climate of the southern region proved especially arable for the crop, which became a protected national staple by the early 19th century. 

What Rice is Used in Brazilian Rice?

Brazilians prefer long-grain rice. This type of rice has less starch, which allows the grains to remain separate as opposed to sticking together. Prior to boiling, Brazilian rice is lightly fried in oil and refogado. Refogado is its own Brazilian staple: a sofrito-style blend of onions, garlic, and olive oil that has been blended into a paste. Many keep a jar handy in the fridge, since it acts as the base flavor for so many dishes. 

You can add other aromatics to your refogado to suit your own tastes. Popular additions in Brazil include tomatoes and bay leaves. Some recipes call for you to simmer the ingredients prior to storing in a jar in the fridge. But this is not necessary for our Brazilian rice, since we will be sauteeing the refogado in oil with the rice. This will cook out the strong flavors of the onion and garlic. 

Do You Have to Use Sofrito for Brazilian Rice?

No, you can just finely mince fresh onion and garlic and sautee these in the pan with the long grain rice. You will have more of a “bite” than with the prepared refogado, since there will be larger, heterogenous pieces. If you prefer your rice more uniform, we suggest preparing the aromatics ahead of time in the refogado style. 

Easy Refogado Recipe for Arroz Brasileiro

Ingredients:

1 small yellow onion
2 large heads of garlic (heads, not cloves! We know, it’s a lot of garlic, but it’s important)
¼ to ⅓ cup of extra virgin olive oil

Directions:

  1. Peel and roughly chop the onion. Smash and peel the cloves of garlic from the two heads. You can make it a little easier on yourself by buying pre-peeled cloves of garlic. You’ll need about a cup total of individual cloves.
  2. Add the garlic and onion and ¼ cup of olive oil to a food processor. Pulse until you have a paste. If it is still chunky, add a little more olive oil.

Now let’s get to the main event: perfect Brazilian rice!

Brazilian Rice Recipe with Refogado

Makes about four servings

Ingredients:

2 cups long grain white rice
2 tbsp extra virgin olive oil
1 tbsp prepared refogado OR ¼ diced yellow onion and 2 minced garlic cloves
1.5 tsp salt
4 cups water

Directions:

  1. Heat a large saucepan over medium heat. Add in the olive oil and the rice. Stir constantly until you see some grains begin to toast (they will take on a light golden color). This should take around 3 minutes. 
  2. When the rice starts to turn golden, add in the refogado or minced aromatics. Stir and cook along with the rice for another 2 minutes.
  3. Add in the water and salt and bring the mixture to a boil.
  4. Reduce the heat to low, then cover. Simmer on low for 25 minutes, or until all the water has been absorbed. 

Serve hot with feijoada and your favorite protein. We love this as a satisfying lunch with some carne seca, or a special meal with Brazilian flank steak

More Great Brazilian Recipes to Try:


Carne Seca (Brazilian Beef Jerky)

Shredded carne seca in a white bowl on tea towel

From the parma hams of Spain to the salted cod of Scandinavia, meat preservation has existed in cultures around the globe since ancient times. Prior to refrigeration, it was a crucial means of making food last longer by preventing spoilage from bacteria and other contaminants. In Brazil, a ration of dried beef was a staple for the gauchos, who required fast and shelf-stable ingredients while driving cattle across the country. Known simply as carne seca (“dried beef”), this Brazilian version of beef jerky remains popular both as a snack and an ingredient. Let’s take a closer look at the history of carne seca in Brazilian cuisine, how it is made, and how it differs from North American beef jerky. 

Carne Seca in Brazil

The first iterations of carne seca in South America were known as charqui, a Quechua term that referred to various types of meat, mostly llama, that were cut in thin strips and dried in the sun. “Charqui” is, in fact, where the word “jerky” comes from. 

There are variations of carne seca according to region. Beef has replaced llama as the most common type of carne seca, although other meats can be used. All Brazilian beef jerky recipes typically involve salt to draw out the moisture and speed the drying process. More or less salt is used depending on local tastes, and other seasonings may be added, such as pepper, and ground herbs. 

What Type of Beef is Used for Carne Seca?

You can use any kind of beef you like to make homemade carne seca. However, it is best to use a leaner cut, such as a top round, bottom round, or flank steak. Picanha will also work beautifully, since the majority of its fat exists in a thick cap on top of very lean muscle. 

North American vs Brazilian Beef Jerky

While carne seca is, indeed, a kind of beef jerky, it has some key differences with its American counterpart. In the US, we think of beef jerky as bite-sized, fairly thick pieces of salted, dried beef that you eat with your hands on the go. The meat often has a smoky or peppery flavor, and is rarely used in cooking.

In Brazil, by contrast, carne seca is utilized predominantly as an ingredient in main courses, such as feijoada and arroz carreteiro. It is usually air dried, as opposed to American jerky, which can be smoked. Prior to using in a recipe, carne seca is typically rinsed to remove excess salt then rehydrated.

The appearance of Brazilian beef jerky is also different. It is often shredded finely, especially when accompanying a side of Brazilian rice and beans. This gives it a more satisfying texture that is much less chewy than larger pieces would be. 

Can You Make Carne Seca at Home?

Absolutely! To make carne seca at home, you basically need three ingredients: beef, salt, and sun. It is also best done in a fairly dry climate, since humidity will attract more pests (even with all that salt). Otherwise, you can use a dehydrator or a Biltong box (see below). 

Homemade Carne Seca Basic Recipe

1. Prepare the Beef

Trim excess fat away from your cut of beef. Then, place it on a baking sheet in the freezer for around 15 minutes until it is partially frozen. This will make it easier to slice into strips.

2. Cut the Beef

Cut the beef in very thin strips (3-4 mm) against the grain. If you have a friend at your local butcher’s, you could ask them to do this for you with the deli slicer and save you a lot of time.

3. Salt the Beef

For every 8 oz of beef you have, add 1 tablespoon of salt. Mix with your hands to be sure all the strips are evenly coated.

4. Cure the Beef

Cover your salted beef strips and refrigerate them for four hours. 

5. Dry the Beef

Now, for the drying. You have a couple options for this. You can be a real gaucho and attempt to sun-dry your beef by hanging it up somehow. A clothesline can come in handy for this method. Simply drape the thin strips over the meat and let the sun do the work. This will take several days and can most certainly invite pests, like birds and insects. Unless you are able to maintain fairly constant vigilance, we recommend either a dehydrator or a Biltong box. 

If using a dehydrator, you can go high and fast or low and slow. We prefer the low and slow method, which sets the dehydrator at 105 degrees Fahrenheit and slowly dries the meat over 20 hours or so. 

The Biltong box is closer to the traditional method, since it involves air drying; but it is protected from pests inside a box. The Biltong box is actually named after a kind of preserved meat eaten in South Africa. Buying one online can set you back a pretty penny, but if you are handy, you can make your own using stuff you probably already have around the house. 

The length of time for drying carne seca in a Biltong box will vary from a few days to a couple of weeks, depending on how thick you’ve cut it. With the thickness we recommended, however, it shouldn’t take longer than 72 hours. 

6. Shred the Beef

Brazilian beef jerky has a signature, shredded texture. This can be easily achieved by pulsing your carne seca in a food processor. Pulse in short bursts until your jerky achieves a fluffy, shredded appearance (kind of like the hairs on a coconut husk). 

Where to Buy Carne Seca?

If you want to save yourself the trouble and simply buy carne seca, it is easily done in the US. It is quite popular in northern Mexican cuisine; as such, many mercado’s will carry pre-packaged shredded beef jerky. You can also buy it online, if you are so inclined. 

If you are looking for a non-shredded version of carne seca that seamlessly blends American and Brazilian tastes, try Texas de Brazil’s all new line of beef jerky. Choose from smoky original or spicy, and indulge your taste buds in a truly delicious and dangerously snackable jerky. Visit our online market to order yours today. 

You´re headed off-site..

Would you like to checkout now?

You're switching shops with items in your cart. Our Gift Card products are sold from a seperate shop than our Butcher Shop & Merchandise products and require seperate checkouts.

If you wish to return to your Gift Card cart, simply navigate back to a Gift Card product page and click the cart icon - if you don't see your products please toggle between our different shopping carts.