PICKUP/DELIVERY Reserve
Reserve Order To-Go

Grilled Tomahawk Pork Chop With Apple Glaze

grilled tomahawk pork chop on a bed of arugula

jump to recipe button

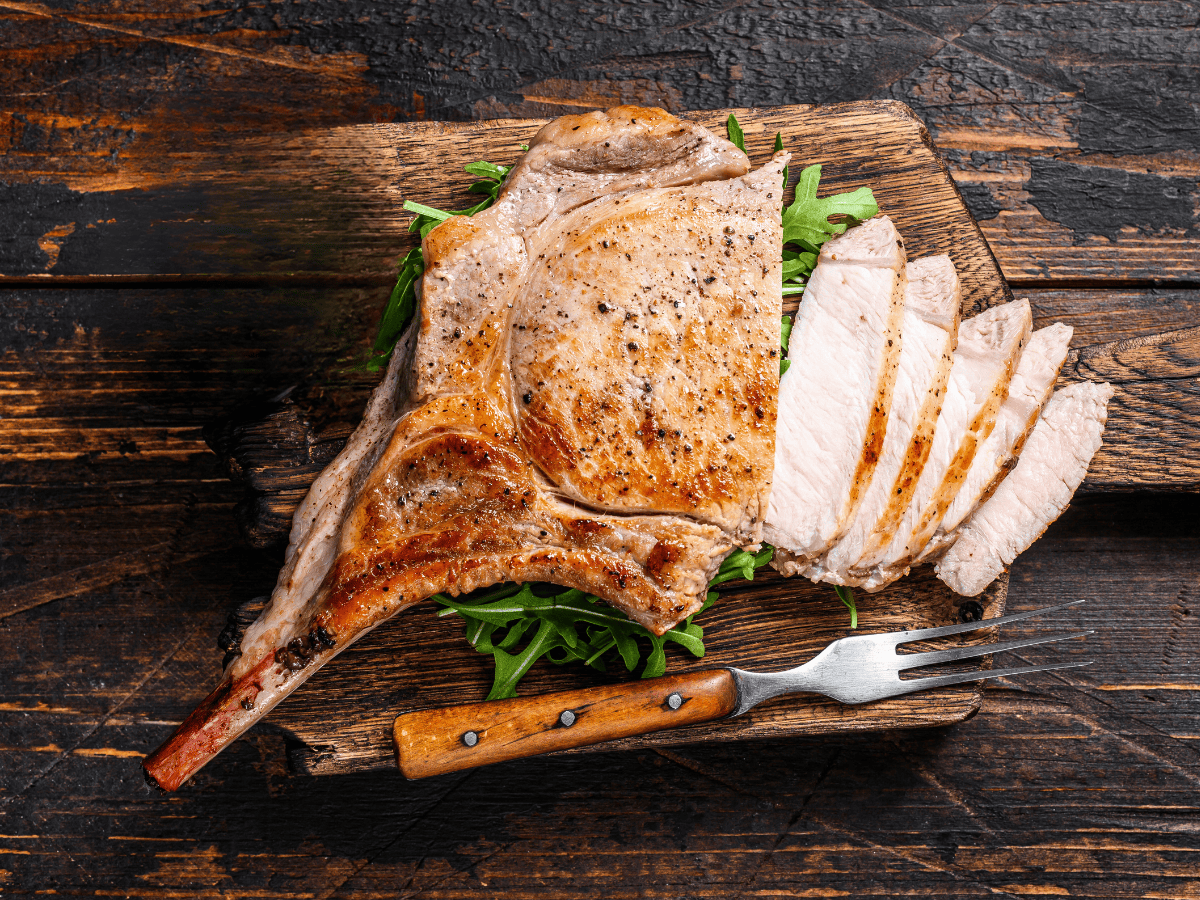
The tomahawk pork chop is a remarkable delicacy, boasting both impressive presentation and succulent flavor. But what exactly sets this cut apart from the rest? Is it any different from a boneless porkchop? Let us teach you more about this rare cut of pork and how to cook it perfectly every time. 

What Cut Of Meat Is A Tomahawk Pork Chop?

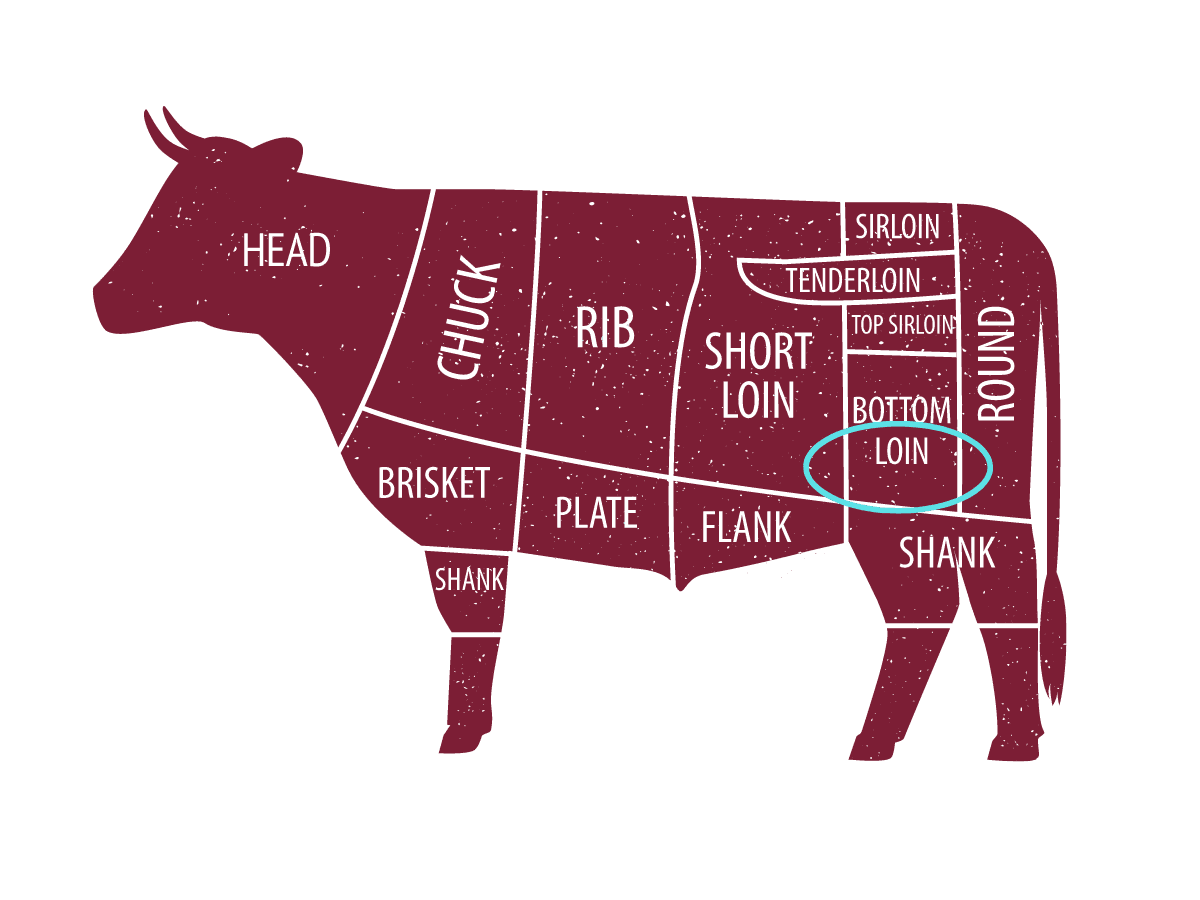
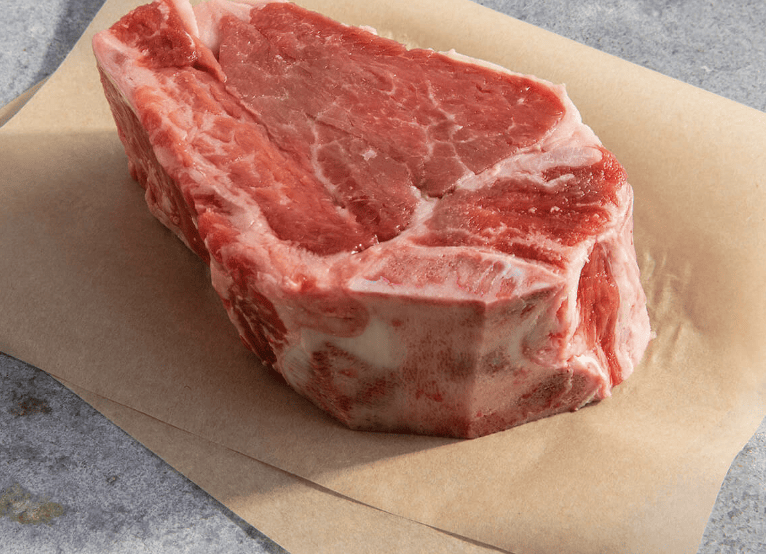
The tomahawk pork chop is derived from the loin section of the pig, specifically from the rib area. It is easily recognizable by several inches of frenched bone poking out. “Frenched” simply means the bone has been cleaned of excess cartilage, fat, and meat. The exposed bone serves an aesthetic and practical purpose: it is impressive to look at and also acts as a convenient handle for flipping in the pan or on the grill. 

diagram of cuts of pork emphasizing location of the tomahawk pork chop

Why Is It Called “Tomahawk” Pork Chop?

The name “tomahawk” is a nod to its resemblance to the traditional Algonquian weapon, which is a long-handled ax used as both a tool and a weapon. The term has been adopted in the culinary world to describe cuts of meat that include an elongated bone, including the tomahawk pork chop and tomahawk ribeyes. 

Are Tomahawk Pork Chops A Good Cut Of Meat?

Absolutely. The tomahawk pork chop doesn’t get as much press as its beef cousin, but it should! The internal bone lends an earthy succulence to an already flavorful cut of meat while also allowing for more even cooking and enhanced tenderness. 

Should You Marinate A Tomahawk Pork Chop?

Honestly, you really don’t need to. This cut of meat is plenty tender without a marinade, and you risk overshadowing the milder pork flavor with too many seasonings. A little salt and pepper and a hit of smoke from the grill is all you need for a perfect tomahawk pork chop. 

That being said, a little boost of flavor from a glaze or dipping sauce never hurt anyone. Pork is famous for pairing well with apples, so we like to baste our finished chops with a fresh, sweet glaze made from apple juice (see below). 

Tips For Cooking the Perfect Tomahawk Pork Chop

Preparation

Allow the pork chop to come to room temperature before cooking. This ensures even cooking throughout.

Seasoning

Use a fairly generous amount of salt and black pepper–more than you think you should (unless you are on a low sodium diet, of course). This is a larger cut of meat, remember. 

Grilling

Unlike many cuts of beef, which do best with a quick, high sear, you want to cook your pork chops over medium heat. Pork needs to be ten degrees hotter than beef to achieve medium rare doneness, so you’ll need to cook it slightly longer. Medium heat will ensure you do not burn/overcook the meat.

Resting

Once the tomahawk pork chop has reached an internal temperature of 145°F (63°C), let the meat rest for ten minutes. 

Serving

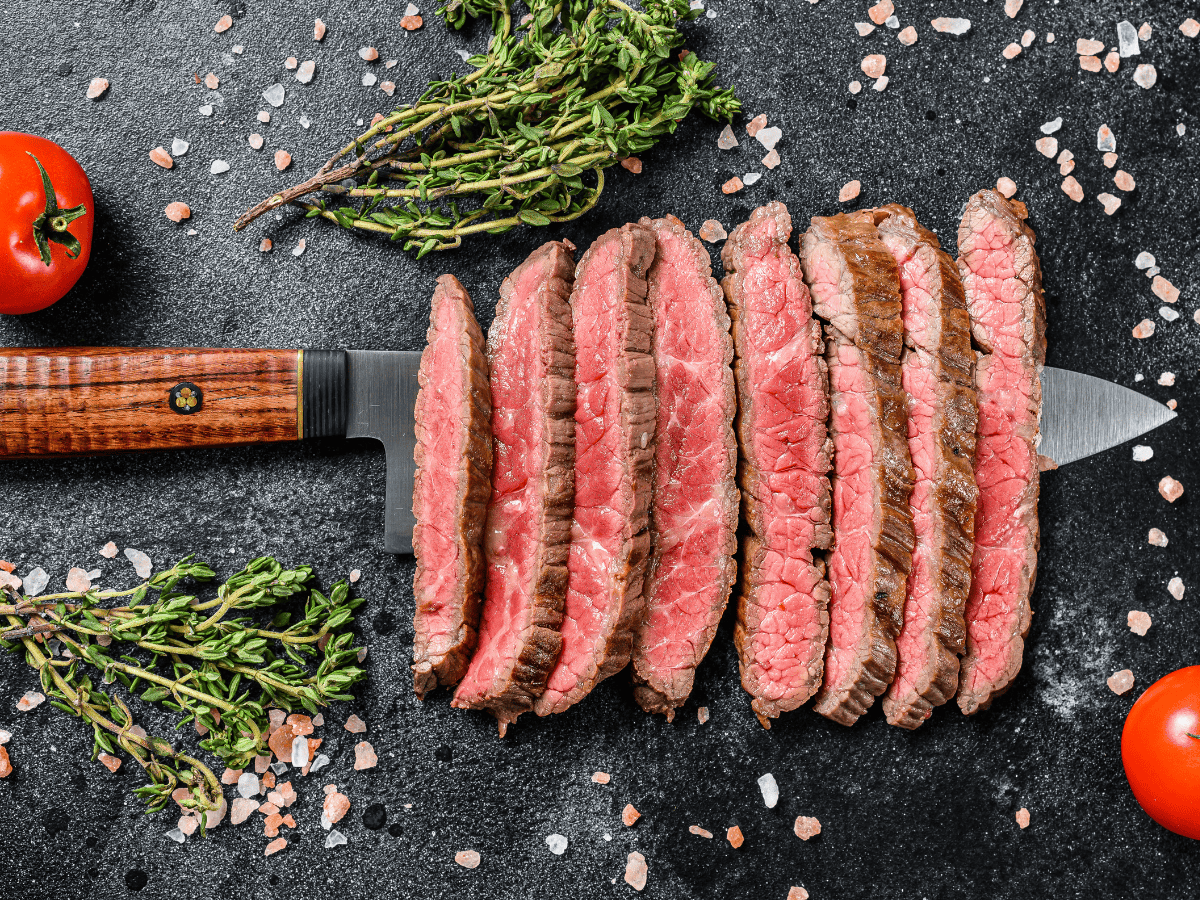
A single tomahawk pork chop can weigh up to 16 oz, which is more than enough to share (though you may not want to). If you want to slice into the chop to serve it, slice against the grain as you would with beef. 

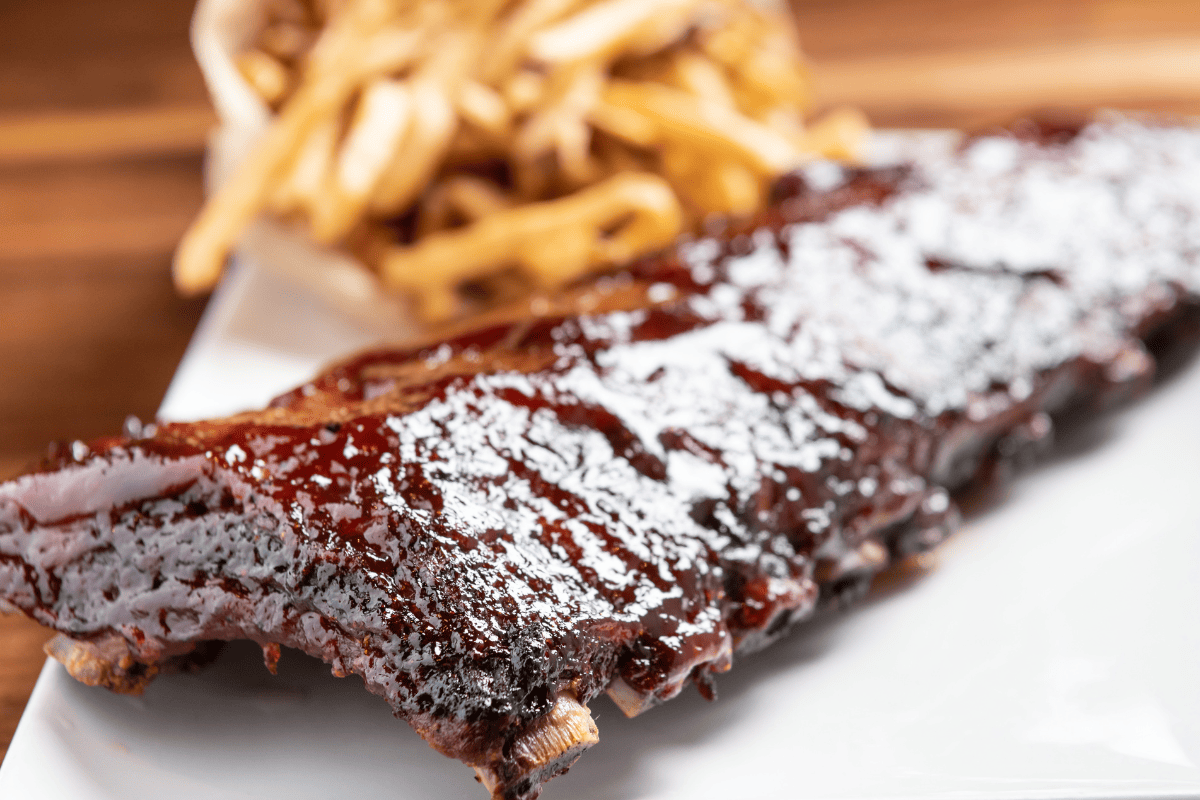
Grilled Tomahawk Pork Chop With Apple Juice Glaze

Ingredients

2 tomahawk pork chops, 14 oz each
One tbsp unsalted butter
One tbsp extra virgin olive oil
1 clove garlic, minced
1/2 shallot, minced
1/2 tsp fresh rosemary, chopped
1 tsp fresh thyme leaves
2 tsp dijon mustard
2/3 cup apple juice
1 teaspoon kosher salt
Freshly ground black pepper

Instructions

Preheat the Grill

Preheat your grill to medium heat, around 350°F. Make sure the grill grates are clean and lightly oiled to prevent sticking.

Season And Cook

Season the pork chops liberally with salt and freshly ground black pepper. Place them on the grill over direct heat. Sear for around 5-7 minutes per side, checking frequently with a thermometer to test for doneness.  

Rest The Pork Chops

Once the tomahawk pork chops are at 140 to 145 degrees fahrenheit (medium rare), transfer them to a plate or cutting board to rest. 

Make the Glaze

While the pork rests, make the glaze. 

  • Heat a small saucepan over medium heat. Melt a tablespoon of unsalted butter and add in the tablespoon of extra virgin olive oil. 
  • Add in the minced shallot and cook for 1-2 minutes, until softened. 
  • Add in the garlic and cook for a further 30 seconds.
  • Stir in the minced herbs and dijon mustard, then pour in the apple juice. 
  • Bring the mixture to a boil then reduce heat to medium. Simmer until it is thickened and syrupy (about 5-10 minutes). 

Serve

Slice each grilled tomahawk pork chop against the grain into thick, juicy slices and ladle a generous spoonful of your glaze over the top. 

What To Serve With Grilled Tomahawk Pork Chops

Your tomahawk pork chop will pair beautifully with classic steakhouse sides, like mashed potatoes, crispy Brussels sprouts, or roasted asparagus. For a little change of pace, you could try the following sides for a Brazilian spin: 

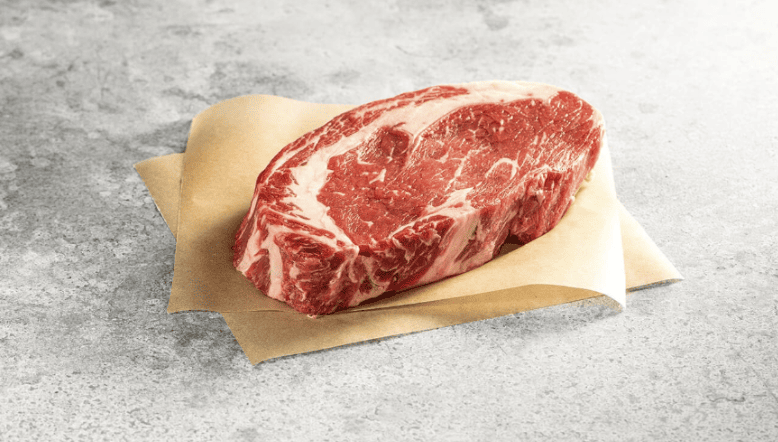
Where Do You Buy A Tomahawk Pork Chop?

This is a rare cut that is often difficult to find outside of specialty butcher shops. You can order them conveniently online from the Texas de Brazil butcher shop, which will send them wrapped and prepped right to your door. Don’t forget to add in a few other choice cuts of meat, like our Australian rack of lamb, spicy picanha, and bone-in filet mignon

Fraldinha: Brazilian Sirloin Flap Steak

faldinha flap steak cooked rare and sliced with herbs and salt in the background

Traditional Brazilian churrasco centers around beef: prime cuts spit-roasted over open coals make for some of the most succulent, flavorful meat you will ever taste. Most of us are familiar with picanha, which is by far Brazil’s favorite cut of meat. But a close second is the fraldinha,  or sirloin flap steak. Bursting with beefy flavor and just the right texture for grilling, it is a must for your next cookout. Let’s learn more fraldinha, including prep and cooking tips. 

What Cut of Meat is Fraldinha? 

cow diagram showing location of bottom sirloin, where flap steak is derived
Faldinha comes from the bottom sirloin of the cow.


Before getting into the details, it’s important to understand what sirloin is: this part of the cow is cut into two sections, top and bottom sirloin. Fraldinha comes from the bottom sirloin, which is traditionally cut into three parts: the ball tip, tri-tip, and flap steak. 

Fraldinha translates to “little diaper” in Portuguese, alluding to the steak cut’s distinctive shape. It is thin, marbled with juicy fat, and versatile. 

raw fraldinha, aka flap steak
Raw flap steak has a distinct shape that Brazilians named “fraldinha” for its resemblance to a diaper.

Fraldinha in Brazil: The Other Favorite Cut 

Often overshadowed by picanha, Fraldinha is frequently mistaken for this similar cut of steak.  Picanha has a thicker layer of fat on one side as it comes from the rump of the cow. This layer of fat adds enhanced flavor that you will not necessarily get in Fraldinha, but the latter cut contrasts with marbled fat throughout the steak so the fat seeps into the beef more evenly.

Both fraldinha and picanha are integral to churrasco, which is a typical beef-grilling method well known in Brazil. Both of these cuts are cooked basically the same way, offering different benefits for your flavor and dish preferences.

Of course, fraldinha is not limited to Brazil. It is a prevalent cut of beef in other South American countries, especially Uruguay and Argentina. In France, flap steak is known as “bavette.” It is served in bistros with a flavorful shallot cream. In Mexico, flank steak is the cut used to make carne asada.

Sirloin Flap vs Flank Steak: What’s The Difference?

Sirloin flap is often used synonymously with flank steak, but they are not the same thing. The bottom sirloin is adjacent to the flank on the cow, but it is a different cut. Flank is derived from the external oblique muscles of the cow, making it a thicker, leaner cut of meat compared to the sirloin flap. 

Fraldinha, on the other hand, has slightly shorter muscle fibers and is somewhat fattier than flank steak. While both cuts are composed of various flat and broad muscles surrounding the abdomen, the placement of the bottom sirloin – which is where the flap steak cut is from – allows for more flavor and tenderness than flank steak.  

In general, however, sirloin flap steak costs about the same as flank steak, and both are cooked and served in similar fashion: long, flat pieces with a nice pink middle and grilled edges. Both are cut against the grain for optimal tenderness. 

Is Sirloin Flap Steak The Same As Hanger Steak?

Sirloin flap steak, as we have learned thus far, can be confused with many different steak cuts. While flap steak is commonly mistaken for both picanha and flank steak, it is also a common misconception that Fraldinha is the same as hanger steak.

Hanger steak comes from the plate of the cow, where it “hangs” between the tenderloin and rib. It is prized for its flavor, tenderness, and relative affordability. Hanger steak is also known as the “butcher’s cut,” because butchers were known to hold this piece back for themselves.

Both hanger and sirloin flap are an economical and delicious alternative to more expensive cuts of beef, such as bone-in filet mignon or a porterhouse. It is worth noting that both flank and hanger steaks are offered in smaller portions at the market–usually around 2 lbs–compared to the flap steak, which is typically 3-4 lbs. 

What is the Best Way to Cook Sirloin Flap?

Fraldinha is best cooked quickly over high heat, such as on the grill. As it is a larger cut of beef, you may be tempted to cut it into smaller portions for cooking–don’t do it! Leave the meat in one piece for cooking, then slice it against the grain after you have let it rest for ten minutes. A large, three-pronged skewer will allow you to easily flip the meat and maintain even cooking. 

How Do Brazilians Eat Fraldinha? 

The beauty of Fraldinha is in its natural, beefy flavor. Brazilians don’t like to disguise this flavor too much, so a dash of salt and pepper is typically all that is added before a quick spit-roast over open coals.

That being said, Brazilians are certainly not averse to condiments with their fraldinha and other cuts of beef. A zesty chimichurri spooned over the top more than fits the bill, as does a side of creamy garlic dipping sauce.  

Do You Marinate Fraldinha? 

Cuts of beef with long muscle fibers, such as flap steak, lend themselves beautifully to a marinade. You can use any marinade you like, just be sure to give it ample time to seep into the meat–at least three hours, but overnight is ideal. For a delicious and simple flap steak marinade, try the following: 

Fraldinha Marinade

For every 1lb of sirloin flap steak:

  • 2 ounces of extra virgin olive oil, 
  • the juice of two limes, 
  • 3 cloves of minced garlic, 
  • 2 ounces of green cachaca, 
  • 1 tablespoon of honey, 
  • 1 tablespoon of soy, 
  • 1.5 teaspoons of salt, 
  • freshly ground black pepper. 

Mix all the ingredients together with the sirloin flap, and marinate overnight (or for 3 hours minimum). 

Sides to Go With Sirloin Flap

Sirloin flap pairs very well with various sides as the grilled meat flavor is distinct and versatile. We recommend Crispy Steakhouse Brussels Sprouts, which are subtle yet flavorful, and offer a healthy option as an addition to your steak dinner. 

Greek Rice Pilaf, otherwise known as Arroz a Griega, is a hearty side that provides an abundance of flavors including garlic and onion, which always pairs well with steak. 

If you like to mix and match your meats in a meal, our Brazilian Collards with Bacon recipe might be for you. Collards are high in dietary fiber and are generally considered a very healthy addition to a meal, and the incorporation of bacon creates a delectable side that pairs well with grilled steak. 

Where To Buy Flap Steak

Sirloin flap steak is making its way into local markets, but it can still be somewhat difficult to find. It is conveniently available in our online butcher shop, where you can find other delicious cuts of meat that will be delivered right to your door in time for grilling season. 

Bone In Filet Mignon On The Grill

raw cut of bone in filet mignon on butcher paper

Filet mignon has earned a reputation among carnivores as one of the tenderest cuts of beef. The words “buttery” and “melt-in-your mouth” often coincide with a bite of perfectly cooked mignon. If you can believe it, bone in filet mignon is even more tender than its boneless counterpart. Today, we’ll teach you how to grill a bone-in filet mignon that is so juicy, you’ll wonder why you ever had it any other way. 

Where Does Bone In Filet Mignon Come From?

Boneless filet mignon comes from the smaller end of the cow’s tenderloin, which is the psoas muscle. There are two of these muscles that run along either side of the cow’s backbone. Bone in filet mignon is larger than boneless, and it comes from the middle of the loin rather than the smaller end. It is butchered with the rib bone intact and protruding slightly from one side. 

The name is French for “cute filet,” likely a reference to the delicate portion and round shape of the filet mignon. Ironically, the French themselves do not call this cut of beef “filet mignon.” This term actually applies to pork  in France and other European countries. What we call filet mignon is more commonly known as “filet de boeuf” or “filet steak.”  

Benefits of Bone In Filet Mignon vs. Bone-Out

As most meat aficionados will tell you, bones mean flavor and succulence. The bone acts as a natural insulator during cooking, helping the meat retain moisture and cook evenly. Furthermore, the cartilage and marrow within the bone seep into the meat, giving it an unctuous texture.

If the flavor and tenderness aren’t enough to convince you, the bone-in filet mignon is also unparalleled when it comes to presentation. It is a rare cut of beef, so having one of these as the star of your next cookout will definitely earn you coolness points. 

Is Bone-In Filet Mignon Lean?

Yes. Bone-in filet mignon is still considered a leaner cut of beef. However, you’ll notice more pockets of marbling compared to the boneless mignon, which is uniformly red and mostly free of connective tissue. 

Bone-in filet mignon is also nutrient dense, being an excellent source of iron, protein, vitamin B12, and calcium. Of course, beef, in general, is higher in calories than other types of protein. Diet-conscious eaters will want to stick to smaller portions or opt for leaner meats, like poultry, lamb, or fish. For reference, a 3.5 oz serving of bone-in filet mignon adds up to around 270 calories. 

Should You Marinate Bone-In Filet Mignon?

You can, but it is not necessary. Marinades can lend flavor but also act predominantly to tenderize the meat. Bone-in filet mignons are already naturally tender, so all they need is light seasoning and a quick cooking method (see below). If you want to kick up the flavor, we recommend topping the finished steak with a generous pat of herbed butter. Try the following:

  • 8 oz softened butter
  • 1 clove minced garlic
  • ½ tsp minced fresh thyme
  • ½ tsp minced fresh rosemary
  • ½ tsp sea salt

Mix all the ingredients together in a bowl, then transfer to a length of cling film or wax paper. Shape the butter into a log, and roll it up tight in the wrapper. Refrigerate it for two hours, then slice onto your steak when needed. 

Tips for Cooking Filet Mignon

Regardless of the method you choose, there are a few key steps when it comes to preparing a perfect bone-in filet mignon:

Doneness Level: Due to its delicate nature ,bone-in filet mignon is best served medium-rare to (135 degrees Fahrenheit) preserve its tenderness and subtle beefy flavor.  

Preparation: allow the steak to come to room temperature before cooking to ensure even cooking throughout.

Cooking Temperature: tender cuts of beef do best at high temperatures and quick cooking times. Sear the filet mignon over high heat to develop a flavorful crust, then finish cooking to the desired doneness on indirect heat.

Resting Time:  let your bone in filet mignon rest for at least  the steak to rest for at least five minutes per inch, or ten minutes per pound. 

Grilling Bone-In Filet Mignon

Grilling filet mignon infuses it with a delightful smokiness while preserving its inherent tenderness. In our opinion, it is the best possible way to prepare this cut of beef. Here’s how to grill the perfect bone-in filet mignon:

Prepare the Grill

Clean and oil the grates of your grill to ensure an even, beautiful sear and avoid unwanted flavors from burned-on bits. 

Preheat the Grill

Preheat one side of your gas grill for high heat. On coals, build your fire off to one side, leaving the other side free for indirect cooking. Ensure your grill is fully preheated before you start cooking the steak. 

Season the Bone In Filet Mignon

Season the steaks on both sides with plenty of salt and freshly ground black pepper. For a 1 lb steak, you’ll want at least 3/4 tsp of salt. 

Grill on High Heat

Place the bone in filet mignon on the grill over direct heat and sear for 2-3 minutes on each side to form a good crust. Then, move it to indirect heat and continue grilling until your thermometer reads 130-135 degrees fahrenheit. 

Rest the Steak

Transfer your bone-in filet mignon to a plate and let it rest for ten minutes. Slice across the grain and serve with a pat of herbed butter. 

Where to Buy Bone In Filet Mignon?

Again, bone-in filet mignons are not easy to come by. Aside from specialty butcher shops, you won’t come across these in person in most stores. Luckily, they are readily available online in Texas de Brazil’s butcher shop: 16 oz of prime, center cut USDA Choice angus delivered right to your door in time for your next cookout. Check out our other offerings as well, from Australian rack of lamb to our world-famous picanha. 

St Louis Style Ribs With Sticky Sauce

barbecue St Louis Style ribs on platejump to recipe button

When it comes to barbecue, few dishes evoke the mouthwatering allure quite like St. Louis Style ribs. Originating from the heart of the Midwest, these succulent ribs are a staple of American barbecue culture, renowned for their tender meat and robust flavor. With grilling season fast approaching, it’s time to revisit cuts like St Louis Style Ribs so you can be prepped for your next barbecue. 

What, Exactly, Are “St. Louis Style” Ribs?

St. Louis Style ribs are a type of spare rib (cut from the lower ribs) that have been trimmed to a uniform rectangular shape. This trimming process removes the brisket bone, sternum bone, and rib tips, resulting in a rack of ribs that cooks evenly and presents beautifully on the plate. The trimmed ribs are typically meatier and more tender compared to other styles, making them a favorite among barbecue enthusiasts.

Baby Back vs St Louis Style Ribs

Baby back ribs are so called because they are cut from where the ribs meet the spine. Contrary to popular belief, baby back ribs do not come from a baby pig. The term “baby” is simply used to describe the fact that they are smaller in size compared to the lower cut ribs. 

a rack of babyback pork ribs with frires
Baby back ribs are smaller with a slight curve to them.

St Louis Style ribs are derived from the meatier portion of the belly side of the ribs. They are cut once the belly has been removed. They are less curved than baby back ribs, which makes them brown more evenly. They also have more fat than baby backs, making them more flavorful and tender when prepared right.

a rack of St Louis Style ribs with a dry rub
St Louis style ribs are spare ribs that have been trimmed for uniform cooking. They are larger and flatter.

Are St Louis Style Ribs From St Louis?

In the US, meat has historically been prepared in establishments known as “packinghouses.” St. Louis was home to as many as 20 packinghouses in the years following WWII, so it makes sense that a specific cut might have been born within the city limits. 

In a fairly ingenious marketing ploy, St. Louis butchers in the 1940s and 50s began to sell their spareribs with the collar removed. The collar is a piece of bone and gristle that is generally discarded anyway. The convenience of the pre-trimmed racks made them widely successful. They even sold for a little more, even though there was technically less meat. 

Are St Louis Style Ribs Wet Or Dry?

St Louis Style Ribs are not defined by a dry or wet sauce. Again, the name is simply a reference to the cut, which is basically a spare rib that has been trimmed. 

Nonetheless, one of the enduring debates in barbecue circles is whether St. Louis Style ribs are better with a dry rub or sauce. The truth is, it ultimately comes down to personal preference. 

Advantages of a Dry Rub: a dry rub consists of a blend of spices, herbs, and seasonings rubbed onto the surface of the ribs before cooking. This method forms a flavorful crust on the ribs as they cook, adding depth and complexity to the meat. Common ingredients in a dry rub include brown sugar, paprika, garlic powder, onion powder, cayenne pepper, and black pepper. The dry rub enhances the natural flavor of the pork and allows the smokiness from the grill or smoker to shine through.

Benefits of Sauce: on the other hand, barbecue sauce provides a tangy, sweet, and sometimes spicy flavor to St. Louis Style ribs. Whether brushed on during cooking or served on the side for dipping, barbecue sauce adds a rich and glossy finish to the ribs. There are countless variations of barbecue sauce, ranging from vinegar-based to tomato-based, each with its own regional flair.

Ultimately, whether you prefer dry rub or sauce comes down to your taste buds. Some purists argue that the smoky flavor of the meat should be allowed to shine with just a dry rub, while others enjoy the saucy goodness of barbecue sauce. We personally like the sweet and smoky addition of a good barbecue sauce, which is why we are including it in today’s recipe. 

What Is The Best Way To Cook St Louis Style Ribs?

Everyone has their go-to method for preparing ribs. Some people boil them before grilling. Some people bake them in the oven for hours. For St Louis ribs, we personally prefer the tag team system of low and slow in the oven, then seared over a hot grill to finish them off. It is much faster than a smoker but still results in the most delicious, fall-off-the-bone ribs you’ve ever had.

Unique Sides to Accompany St. Louis Style Ribs

No barbecue feast is complete without a selection of mouthwatering sides to accompany the main event. In addition to the classics, like baked beans, mac and cheese, coleslaw, and cornbread, consider these unique Brazilian sides to serve with your St Louis Style ribs:

  • Gourmet Brazilian Pasta Salad (Macarronese): macaroni salad gets a gourmet twist with a flavorful dijon dressing, crumbly bacon, and fusilli noodles to soak in all the sauce.
  • Brazilian Potato Salad (Maionese de Batata): simple, creamy, and delicious, this potato salad recipe includes shredded carrots for sweetness and crunch. 
  • Feijoada with Farofa: there’s a reason this is the national dish of Brazil. Black beans are slow simmered with pork and aromatics, then topped with a crunchy dusting of toasted cassava flour. They’ll give baked beans a run for their money any day. 
  • Pao de Queijo (Brazilian Cheese Bread): these bite sized morsels are crisp on the outside and gooey on the inside. What’s more, they are very easy to make. That is a good thing, because you will want to make a lot of them. 

St Louis Style Ribs Recipe

Now, for the good part: an oven-to-grill St Louis Ribs recipe finished with a sweet and tangy homemade BBQ sauce. 

Ingredients:

For the ribs

2 racks St. Louis Style pork ribs
1/4 cup brown sugar
2 tablespoons paprika
1 tbsp garlic powder
1/2 onion powder
1 tbsp smoked paprika
Freshly ground black pepper
1 tbsp salt
1 teaspoon cayenne pepper (adjust to taste)

For the sauce

1 cup ketchup
½ cup brown sugar
⅓ cup apple cider vinegar
⅓ cup molasses
1 tsp worcestershire sauce
2 tsp dijon mustard
1 tsp fenugreek powder
2 tsp garlic powder

Instructions:

Prepare the Ribs

If not already done, remove the membrane from the back of the ribs. This helps the seasonings penetrate better and makes the ribs more tender. Rinse the ribs under cold water and pat them dry with paper towels.

Prepare the Dry Rub

In a small bowl, mix together the brown sugar, paprika, garlic powder, onion powder, smoked paprika, black pepper, salt, and cayenne pepper until well combined. This will be your dry rub.

Season the Ribs

Rub the dry rub generously over both sides of the ribs, pressing it into the meat to adhere. Wrap the seasoned ribs tightly in plastic wrap and refrigerate for at least 2 hours, or preferably overnight. This allows the flavors to penetrate the meat.

Preheat the Oven

Adjust the oven racks to the middle and bottom position. Preheat the oven to 350 degrees Fahrenheit. Retrieve your ribs from the fridge and remove the plastic wrap. Transfer them to a length of tin foil and wrap them in the foil completely. Place the ribs on two separate baking sheets.  

Cook the Ribs in the Oven

Roast the ribs in the oven for 2 hours, rotating them from top to bottom half way through. 

Prepare BBQ Sauce

While the St Louis Style Ribs cook, make your barbecue sauce. Whisk together all ingredients in a medium saucepan and bring the mixture to a simmer. Reduce the heat to low and let it cook for twenty minutes or so to let it thicken a bit. When it is ready, cover it and put it in the fridge for later. 

Grill the St Louis Style Ribs

When the ribs have cooked for two hours, preheat your grill to medium-high heat. Remove the ribs from the foil and brush them with a light layer of homemade sauce. Put the pot back on the oven to reheat the rest for later. Sear them on the grill for 3 minutes or so on each side. 

Glaze with Barbecue Sauce

Brush your finished St Louis Style Ribs with a generous amount of your barbecue sauce, with more on the side, if desired. 

Order St Louis Style Ribs 

Did you know you can order premium St Louis Style Ribs to be delivered right to your door? Texas de Brazil’s online butcher shop features a la carte and package options to suit every taste and cooking style. Check out our other offerings as well: Australian rack of lamb, bone-in filet mignon, and, of course, our world-famous picanha.  

Denver Steak

Raw Denver steak with fresh herbs and red peppercorns

The Best Cut of Beef You’ve Probably Never Heard Of

If you’re a steak enthusiast, you’ve likely savored a variety of cuts ranging from ribeye to filet mignon. But have you ever heard of the Denver steak? This lesser-known cut is a hidden gem in the world of beef, offering a delectable combination of tenderness and rich flavor. 

What is a Denver Cut Steak?

Denver steak, also known as the Denver cut or Denver chuck steak, is a relatively new addition to the world of beef cuts. It’s sourced from the chuck primal, specifically the serratus ventralis muscle, which lies beneath the shoulder blade. For this reason, it is sometimes called a “chuck under blade” steak. 

diagram of the location of the Denver steak, aka the serratus ventralis muscle
The Denver Steak comes from an area under the shoulder blade called the “serratus ventralis.” The name is derived from the fact that it looks like a saw with serrated edges.


The serratus ventralis has a high marbling content, making it exceptionally buttery. In fact, The Denver steak is considered the fourth most tender muscle in the cow, surpassed only by the tenderloin, flat iron, and ribeye cap. Unlike other cuts, however, the Denver steak is far more affordable. Its tenderness and relatively low price are what make it so popular in the first place. 

Why Is It Called “Denver” Steak?

The name “Denver steak” is somewhat puzzling, as it doesn’t seem to have any direct connection to the city of Denver, Colorado. Rather, it was developed by the Beef Checkoff, a program that aims to both consumer demand for beef by finding new and more affordable cuts. The program was established in 1985 as part of the Farm Bill. It is sponsored by the National Cattlemen’s Beef Association (NCBA). 

The Denver Steak appeared in 2008 alongside four other cuts from the chuck primal roll: the Delmonico steak, America’ Beef Roast, Boneless Country-Style Beef Chuck Ribs, and the Sierra Cut. 

While the name was most certainly chosen as a marketing tactic, the choice of Denver remains a mystery. We hypothesize that the names of the steaks were chosen to represent regions of the United States: 

  • “Sierra” for the West Coast, in honor of the Sierra Mountains in California
  • “Denver” for the mountain states
  • “Country-style” to represent the southern states
  • “Delmonico” to represent the East coast. (Delmonico’s is a famous New York steakhouse  that popularized a similar cut in the 19th century)
  • And, finally, “America” Beef Roast to bring it all together

Or, more simply, it could be that the NCBA is headquartered in Centennial, just outside of Denver, Colorado. 

Where Do You Buy Denver Steak?

Denver steak may not be as widely available as other cuts, but you can often find it at specialty butcher shops, upscale grocery stores, or online meat suppliers. When purchasing Denver steak, look for cuts with good marbling and a deep red color, indicating quality, freshness, and tenderness.

Best Ways to Cook Denver Steak

Due to its inherent tenderness, the Denver steak cut is best suited to high heat and fast cooking. This can be accomplished using various cooking methods, including grilling, pan-searing, or broiling. The best way, though, is on a grill.

Do You Need a Marinade?

The Denver cut is plenty flavorful and tender on its own, but we often like to use a marinade to punch up the flavor even more. We’ll give you a recipe for one below or you can borrow the one from our churrasco steak blog post. 

Denver Steak Substitutes

If you cannot find the Denver cut, your next best bet will be a ribeye. Although it comes from a different part of the cow, ribeyes are known for their superior tenderness, ample marbling, and deep beef flavor. Like a Denver steak, they also lend themselves to high heat via searing or on the grill. 

When looking for a good ribeye, check first for color and thickness: you want at least one inch thick (preferably 1.5) and a uniform red color. Then, check for marbling. It should be easily visible and fairly evenly distributed. 

raw ribeye steak on butcher paper
Texas de Brazil’s online butcher shop delivers USDA Choice Angus ribeye steaks right to your door. No marinade is necessary for these–just a dash of salt and pepper, and they’re ready for the grill. 

Grilled Denver Steak with Honey Garlic Marinade

Ingredients:

2 Denver steaks (approximately 8-10 ounces each)
¼ cup olive oil
2 cloves garlic, minced
2 tablespoons soy sauce
1 tablespoon Worcestershire sauce
1 tablespoon balsamic vinegar
1 teaspoon Dijon mustard
2 teaspoons honey
1 teaspoon dried thyme
1/2 tsp salt (more to taste)
Freshly ground black pepper

Instructions:

  1. In a small bowl, whisk together olive oil, minced garlic, soy sauce, Worcestershire sauce, balsamic vinegar, Dijon mustard, honey, dried thyme, salt, and black pepper to create the marinade.
  2. Place Denver steaks in a shallow dish or resealable plastic bag and pour the marinade over them, ensuring they are evenly coated. Cover or seal and refrigerate for at least 2 hours, or preferably overnight, to allow the flavors to infuse.
  3. Preheat the grill to medium-high heat and lightly oil the grate to prevent sticking.
  4. Remove Denver steaks from the marinade and discard any excess marinade.
  5. Grill steaks for 4-5 minutes per side for medium-rare doneness, or adjust cooking time according to your desired level of doneness.
  6. Once cooked to your preference, remove the steaks from the grill and let them rest for a few minutes before slicing against the grain.
  7. Serve the grilled Denver steaks with a side steakhouse garlic mashed potatoes or crispy brussels sprouts

Steak Catering

Nothing screams “opulence” more than a catered steak dinner. Texas de Brazil offers steak catering at each of our 50+ locations to make your next event extra special. You have your choice of our premium flame grilled meats, mouth watering side dishes, and sweet treats to finish off a perfectly decadent meal. Go online to view our available catering options in your city today. 

Grilled Rack of Lamb

grilled rack of lamb arranged on a platejump to recipe button

Easter is celebrated with various customs and traditions around the world. A rich meal is often the focal point, especially after weeks of fasting during Lent. One of the most ubiquitous items on the Easter dinner table is lamb. This tradition has deep historical and cultural roots, making it a significant part of the holiday festivities for many families. Today, we will teach you how to make a grilled rack of lamb for a simple yet decadent holiday centerpiece.  

Why is Lamb Eaten at Easter?

In the Christian faith, Jesus is twice referred to as the “Lamb of God” in the Gospel of John. Eating lamb at Easter is meant to commemorate the sacrifice of Jesus and to celebrate his resurrection. 

Lamb is also an important symbol in Judaism. The Paschal Lamb was the animal sacrificed in the first Passover on the eve of the Exodus. Its blood was painted over the doorways of the homes of Jewish slaves so they would be spared the Tenth Plague of Egypt:  the death of the firstborn sons. For this reason, lamb is also often eaten at Jewish Passover dinner. 

In addition, Easter and Passover often coincide with the Vernal Equinox, which was an important date for pre-Christians. Disablot, for example, was a Scandinavian tradition dating from prehistoric times. A blood sacrifice was made in honor of the disir, female spirits associated with a bountiful harvest. The festival also honored the Valkyries, winged female deities who guided the souls of the dead to Odin. Although few accounts exist of exactly what was sacrificed, it is reasonable to assume that Spring lambs were on the docket. 

Grilled Rack of Lamb Variations

In addition to a grilled rack of lamb, there are plenty of other preparations that appear in various cuisines around the world. In Greece, for example, magiritsa uses the offal, or innards of the lamb, to make a hearty stew with wild greens and a zesty lemon sauce. The Greeks are also famous for their souvla: a whole lamb spit-roasted over hot coals. 

The Finns have a recipe for Finskt lamm, which involves roasting a leg of lamb then covering it with a sweet, red currant glaze. It is usually served with roasted potatoes and other vegetables.  

In Italy, a special preparation of lamb called “abbacchio” is actually regulated by the European Union with the Protected Geographical Indication mark. The term refers to the type of lamb used as opposed to a distinct recipe. An abbacchio is simply a suckling lamb that is between 28 and 40 days old and weighs around 15 lbs. It can be grilled, roasted, stewed, or braised, so long as it fits the age and weight requirements. 

Suffice to say, you’re not limited to grilled rack of lamb when it comes to Easter. However, the simplicity of this recipe makes it a top contender, in our opinion. 

Helpful Hints for Perfect Grilled Lamb

Grilled rack of lamb is pretty fool-proof, but there are a few things you will want to keep in mind to get the best flavor and texture:

  • Don’t skip the marinade: the marinade is important in flavoring the meat, but it is also essential for tenderizing it.
  • Use the right heat: sear the outside quickly with high heat, then cook the inside of the meat slowly over indirect heat.
  • Don’t overcook the lamb: lamb is best served medium rare (130 to 135 degrees Fahrenheit.) You can get away with medium, but don’t go any higher than this, or you’ll get a pretty tough texture. 
  • Cover exposed bones with foil: most racks of lamb come “frenched,” with the rib bones trimmed for elegance and convenience, should you wish to eat yours cave-man style. These bones can burn, so you will want to cover them with aluminum foil before grilling.

Side Dishes for Grilled Rack of Lamb

The right side dishes are nearly as important as the lamb itself. Lamb has a generally mild flavor that is compatible with a wide variety of sides. Instead of the usual roast potatoes or green beans, why not try a few of the following:

Grilled Rack of Lamb Recipe

This dish is not only elegant and flavorful but also surprisingly simple to prepare, making it perfect for both intimate family gatherings and festive feasts.

Ingredients for Grilled Rack of Lamb:

2 racks of lamb, frenched (about 1 ½ pounds each)
4 cloves garlic, minced
2 tablespoons fresh rosemary, chopped
2 tablespoons fresh thyme, chopped
1 tbsp brown sugar or honey
1/2  cup olive oil
Juice of two lemons (about 2 oz)
2 tsp of salt (more to taste)
Freshly ground black pepper

Directions: 

Prepare the Marinade for the Grilled Rack of Lamb

  • In a medium bowl, whisk together the minced garlic, chopped herbs, brown sugar, olive oil, lemon juice, salt, and black pepper. 
  • Place your lamb in a resealable freezer bag or a shallow dish you can cover. Pour the marinade over the meat and make sure it is completely coated.
  • Leave the meat to marinate in the fridge for at least six hours, preferably overnight.

Get Ready to Grill

  • Remove the rack of lamb from the fridge and let it come to room temperature (about 20 minutes). Cover the exposed bones with tin foil.
  • While the meat rests, preheat your grill: set it on “high” on one side only. For coal grills, mound the charcoal off to one side to contain the heat there as much as possible.

Grill the Lamb

  • Start by searing the rack of lamb with the fat side down. (This is the more rounded, meaty part, while the back is more bony.) Grill for about four minutes, or until you can see grill marks. Then, flip the meat and sear for another 2-3 minutes on the other side.
  • Transfer the rack of lamb to the cooler side of the grill. Cook on indirect heat until the meat reaches an internal temperature of 130 degrees Fahrenheit (15-20 minutes).

Rest the Grilled Rack of Lamb

  • Wrap the lamb in foil and allow it to rest for fifteen minutes. Then, slice along the bones to make individual portions and serve. Or, carve it tableside for added flair. 

Where to Buy Rack of Lamb

You can buy a rack of lamb in most grocery stores these days, but the quality is not guaranteed. The flavor and texture of lamb is highly dependent on the age of the animal and where it was raised. For a special holiday meal, you will want only the finest meat for your guests. 

For our money, you can’t go wrong with Australian lamb. Aussie lamb is free range and grazed exclusively on the country’s wide-ranging grasslands. The taste is naturally mild, lean, and clean with an unsurpassed tenderness. 

Luckily, you can order Australian lamb for your Easter Dinner to be delivered right to your door via our online Butcher Shop. Be sure to check out our current coupons for deals on butcher box orders, including freebies like Brazilian sausage. 

St Patrick’s Day Treats

Brigadeiros With White Chocolate and Irish Cream

Brazilian St. Patrick's Day treats: green brigadeiros made with Irish creamjump to recipe button

March 17 is fast approaching. If you are celebrating at home, you will need plenty of St Patrick’s Day treats to keep your guests happy. We offer you this festive spin on a classic Brazilian party snack: brigadeiros made with white chocolate (colored green, of course!) and spiked with delicious Irish cream liqueur. 

What is Irish Cream?

Irish cream is actually an English invention, created in 1973 by Thomas Jago. Jago was a liquor executive from Cornwall. He marketed a drink that combined traditional Irish whiskey with heavy cream, sugar,  and subtle flavorings of vanilla and chocolate. The concoction was sold under the label “Baileys,” which has since become a household name. 

Interestingly, Jago was also the mastermind behind two other famous brands: Malibu flavored rum and Johnnie Walker Blue Label Scotch Whisky. 

When Is St Patrick’s Day?

St. Patrick’s Day, or the Feast of St Patrick, occurs on the same day every year: March 17. This is historically considered the death date of Patrick, a 5th century bishop and missionary who is credited with converting Ireland’s predominantly pagan population to Christianity. 

Patrick’s efforts were later communicated allegorically: the heathen traditions of the pagans were symbolized as snakes, which were driven away from the Isle by St. Patrick. It is a good story, despite the fact that no snakes have ever been known to inhabit Ireland. 

The Feast of St Patrick was officially recognized by the Catholic Church in the 17th century. It is also observed by the Anglican Church, Lutherans, and Eastern Orthodox denominations.   

St. Patrick’s Day in Brazil

You may be curious to know if Brazilians celebrate St. Patrick’s day in the same way as Americans. In the US, we tend to splash out with parties, parades, greenery, lots of Guinness, and traditional Irish dishes, like corned beef with cabbage. 

While Brazil is not home to as many Irish descendants as the States, it is still a predominantly Catholic country whose citizens also happen to enjoy a good party. Brazilians are embracing St. Paddy’s Day traditions more and more, adopting familiar rituals like wearing green and listening to Irish music.

St. Patrick’s Day in Brazil has become so popular in recent years that, in Rio, the famous Christ the Redeemer statue is lit with a green light for the day! 

What Are Brazilian Brigadeiros?

Brigadeiros are a bite-sized Brazilian dessert made with chocolate and condensed milk. They are similar to American fudge, except they are rolled into balls and served in little candy cups. The traditional recipe originated in the 1940s and was named after Brigadier General Eduardo Gomes, a presidential candidate at the time. The general strong support from female voters, many of whom would prepare the treats for rallies and meetings.  

The traditional Brigadeiro recipe was made with cocoa powder, butter, and condensed milk. Since then, many, many variations have arisen, including today’s St Patrick’s Day treats. The one ingredient that remains constant is condensed milk. Condensed milk desserts have a long history in Brazil. As was the case with Brigadeiros, many home chefs developed recipes using condensed milk during and slightly after WWII, when items like fresh milk and sugar were still rationed.   

Can You Make The Brigadeiros Ahead of Time?

Certainly! You can store either the batter or pre-rolled brigadeiros in the fridge for up to seven days before you serve them. Just remove them fifteen minutes or so to let them soften before eating.

These St. Patrick’s Day  treats will also keep for several months in the freezer. Let them thaw for 60 minutes before rolling them in the sprinkles and placing them in their paper cups.

Kid Friendly St Patrick’s Day Treats

Because we are adding the Irish liqueur to our St Paddy’s day brigadeiros off the heat, they do retain some alcohol content. As such, these treats are not meant for children. You can leave the Bailey’s out entirely to make a kid-friendly version, or you can use an Irish cream-flavored syrup, like the kind they use at coffee shops. 

Brigadeiro Variations

You can have some fun customizing your St Patrick’s Day treats by using different toppings. We used plain, white sugar to dust ours (we wanted to be sure you could see the green color), but you can use almost anything as the finishing touch for yours. Common brigadeiro toppings include:

  • Chocolate sprinkles or shaved chocolate
  • Shredded coconut
  • Citrus zest
  • Chopped nuts
  • Chopped, dried fruit
  • Crushed M&Ms or Reese’s Pieces

Irish Cream Brigadeiro Recipe

Ingredients:

1 tbsp butter, unsalted
1 can (14 oz) sweetened condensed milk
3.5 oz white chocolate chips
¼ tsp salt
3-5 drops green food coloring
1 tsp pure vanilla extract
1 oz Bailey’s Irish Cream
1/4 cup white sugar to coat your St Patrick’s Day treats
20 no. 3 paper candy cups (these ones come in green)

Directions:

Step 1: Make the Batter

  • Grease a casserole dish or other shallow baking vessel with butter or nonstick spray. 
  • Heat a mid-sized saucepan over medium heat. Melt the tablespoon of butter and mix in the can of condensed milk and salt. 
  • Heat the mixture for a few minutes, stirring frequently. When it is warmed through, add the chocolate chips a little bit at a time. Whisk until all the chocolate has melted.

Step 2: Let the Mixture Thicken

  • Keep stirring the mixture for ten more minutes. This may seem like a long time, but it is necessary to achieve the desired texture. 
  • Do a thickness check: take a rubber spatula and draw it down the middle of the batter in your pan to make a line. If it takes the mixture a few seconds to pool back over the line, you are ready. 

Step 3: Chill the Dough

  • Remove the pan from the heat and whisk in your vanilla extract and Irish cream. Add a few drops of green food coloring until you reach your desired level of pigment.
  • Transfer your mixture to the greased baking dish and chill in the fridge for one hour.

Step 4: Prepare Your Rolling Station 

  • While the dough chills, prepare your rolling station by lining up your bonbon cups and filling a plate or bowl with your sprinkles. You should need about 20 no. 3 candy cups for this recipe. 

Step 5: Make the St. Patrick’s Day Treats

  • Now, you are ready to make your brigadeiro balls. Measure out about a tablespoon of the mixture and roll it between your hands to form a ball. Then, roll the ball into the dish of sugar, pressing lightly to coat it evenly. Put the finished ball into a candy cup and repeat the process until you are out of dough. 
  • If you wish, you can “stamp” the top of each of your St. Patrick’s Day treats with a little heart or shamrock. Plunger cutters for fondant work well and are available in lots of shapes and sizes. 
  • Serve your Irish cream brigadeiros immediately with hot coffee or a glass of good Irish whisky. 

Satisfy Your Sweet Tooth at Texas de Brazil

Want more sweet treats? Visit one of Texas de Brazil’s fine dining locations and be sure to save room for one (or two) of our delectable desserts: cheesecake, papaya cream, carrot cake, creme brulee and more. If you feel like staying in, we’ve got you covered: order catering for pickup to enjoy your favorite churrasco meats, sides, and sweets in the comfort of your own home or office. 

Bacalhau a Bras

Easter Comfort Food

plate of bacalhau a bras, a Brazilian dish made with egg and salt cod

jump to recipe button

If you like seafood, this Bacalhau à Brás recipe is for you. This traditional dish ties together savory cod with warm, comforting potatoes, often served with any variety of Brazilian sides and garnished with fresh parsley and olives. While the recipe requires significant preparation, this meal is well worth the wait. Bacalhau à Brás is a long-standing tradition in Brazilian culture for Easter brunch, lunch, or dinner. It actually originated in Lisbon in the late 19th century; its founder, of the last name Braz, deserves a round of applause for his accessible, affordable, and delectable invention. 

What is Bacalhau à Brás?

Bacalhau à Brás is a creative and inexpensive recipe: it is a meal anyone can make while still having fun with it. It is a simple dish made with rehydrated salt cod, eggs, potatoes, aromatics, and olives.

Historically, Bacalhau à Brás is remarkable: in an effort to reduce food waste, it is said that chef Braz would use the less meaty parts of the cod which one would usually toss. After deboning the cod, the skin would be removed and the remaining fish shredded. As such, all parts of the fish were put to use. Even the potatoes – traditionally cut in long thin slices – could be made from scraps. 

A household staple, eggs are a perfectly wholesome addition to this lovely Spring meal. The eggs are optional, but they lend a creamy, buttery texture that also binds the fish and potatoes together. 

When Do Brazilians Eat Salt Cod?

Brazilians eat bacalhau all year long, but it is most commonly prepared during the week of Easter, namely on Good Friday. If you are in search of a variation of this recipe but still want the flavor of salted cod, salt cod in cream is a similar dish that is also common during this time of year. 

Bacalhau à Brás is also prepared in countries other than Portugal and Brazil. In historically Roman Catholic countries, recipes with salted cod as the star ingredient gained popularity as the Church forbade the consumption of red meat on all Fridays during Lent, Ash Wednesday, and Good Friday. 

Many cultures have developed their own unique take on meals incorporating the foods they have access to when red meat is not an option, and Bacalhau à Brás is an ideal example of that. 

For those anxiously awaiting the days when red meat is back on the menu, be sure to stock up with one of our butcher boxes: premium cuts of beef, pork, and lamb delivered right to your door in time for Easter dinner and the start of grilling season.

Preparing Bacalhau 

Bacalhau à Brás requires some special considerations, mostly to do with preparing the salt cod. You do not want to use it straight out of the package, unless you enjoy a mouthful of straight salt. Prior to use, salt cod needs to be soaked in water for an extended amount of time. This “de-brines” it and also rehydrates it somewhat for better texture.

We recommend soaking your salt cod overnight, but you can get away with a few hours in a pinch. Ideally, you should also change out the water at least once during soaking. Give the fish one final rinse with fresh water before you add it to your bacalhau a bras dish. 

Can You Use Fresh or Frozen Cod for Bacalhau à Brás?

Bacalhau à Brás can be made with fresh or frozen cod, too. If you plan to cook with fresh cod, though, you will need to account for longer cooking time. Salted cod is preserved, which means that it is actually already “cooked” and ready to be thrown into the mixture of flavors as soon as some of the salt has been removed during the soaking process. 

If you are looking for a healthier alternative, using fresh cod will significantly reduce the amount of sodium in the dish. Of course, fresh cod is always preferred, but buying it frozen will do the trick just as well. Just be sure to prepare it according to package ingredients. 

What Do You Serve With Bacalhau à Brás?

Bacalhau à Brás is plenty hearty on its own, but you won’t often find a meal in Brazil without the ubiquitous, aromatic white rice and feijao with farofa. Bursting with flavor, both of these sides are great options if you are looking to fill a hungry belly. 

Traditional Brazilian white rice calls for lots of garlic paired with onion and some oil to keep the rice loose. Brazilians cook it so often they often prepare a jar of the aromatics ahead of time. This is called “refogado. 

Feijao refers to another traditional and unique side dish which combines black beans simmered with meat trimmings of choice and topped with crisp farofa, a garnish made from nutty, toasted cassava flour. The meat can vary greatly according to taste and region. Brazilian cuisine really allows for creative autonomy; you can add any meat that sounds good to you, be it bacon, Brazilian sausage, beef short ribs, or even pig’s feet. The options with this side dish are endless. 

Bacalhau à Brás Recipe

Ingredients:

3 lbs salt cod, soaked in cold water overnight
2 large yellow onions, thinly sliced in rings or half moons
1 clove garlic, minced
2 bay leaves
2 oz white wine (dry, not sweet)
2 lbs golden potatoes
8 large eggs
¼ cup whole, pitted olives
Extra virgin olive oil
Freshly ground black pepper
Salt, to taste
½ cup fresh parsley + more for garnish

Directions: 

  1. Rinse the pieces of cod with cold water after overnight soaking. Then, place the cod in a large pot with enough water to completely submerge it.
  2. Bring the water to a boil over high heat and reduce the temperature to medium. Let the cod cook for 8-12 minutes, or until the fish is flaky and tender.
  3. Reserve 1 cup of water from the pot and discard the rest. Let the cod cool.
  4. While the cod cools, preheat your oven to 450 F/230 C. Cut your golden potatoes into very thin slices, like matchsticks or shoestring fries. You can leave the skin on or off, depending on your preference.
  5. Put the potatoes on a baking sheet and toss in a little extra virgin olive oil. Season liberally with black pepper and a little salt. Roast until they are golden and crisp (about 25-35 minutes).
  6. While the potato sticks roast, return to the cod. Remove any bones you find along with skin. Carefully shred the cod with your fingers or two forks, then set it aside.
  7. Mix the eggs, some black pepper, and a pinch of salt with a whisk, or beater.
  8. In the same pot you used to cook the cod, heat a drizzle of olive oil over medium heat. Sauté the onions in the hot oil for 4-5 minutes, or until they are translucent. Then add in the garlic and cook for a further 30 seconds or so. 
  9. Add the wine, reserved fish stock, and bay leaves and cook until the mixture has reduced, or for about 2 minutes.
  10. Remove the bay leaves, then add the shredded cod and parsley to the pot, stirring well to combine. 
  11. Add the beaten eggs, stir and cook until they are set, but not scrambled. It should have the appearance of a uniform sauce. 
  12. Combine the fish mixture with your roasted shoestring fries. Transfer it to a serving dish and dot the top with olives and fresh parsley. 

Enjoy!

Easter Brunch Made Easy 

Bacalhau à Brás can just as easily be served for Easter Brunch. After all, it is essentially fish with hashbrowns and eggs! Of course, you can make things even easier on yourself this Easter by visiting one of Texas de Brazil’s 50+ locations. Enjoy our famous salad bar and delectable sides, along with our mouth watering churrasco favorites sliced tableside. Take a look at our menu for more ideas to get busy in the kitchen. 


Feliz Pascoa: Easter in Brazil

wrapped ovos de pascoa for Brazilian Easter

Brazil remains a predominantly Catholic nation, with nearly 70 percent of the population identifying as such. This means Easter, or “Pascoa,” is a big deal. With Carnival drawing to an end, Brazilians turn their attention to the more solemn-yet-still-joyful traditions of Easter. While Brazil celebrates in much the same way as the US, with chocolate eggs (called “ovo de pascoa”) and Easter Mass, there are a few rituals that are a nod to the country’s unique history and blend of cultures. 

Pascoa in Brazil

The Ovo de Páscoa

In Brazil, Easter eggs hold a special place in the hearts of both children and adults. Unlike American eggs, which are often small and plastic or hard boiled, a Brazilian ovo de pascoa is chocolate and LARGE–about the size of a pineapple. Some are filled with more chocolate, but most are hollow and contain small toys or wrapped candies. 

The ovos de Pascoa are sold wrapped in foil that is twisted and fluted at the top. You can find them lining the aisles of supermarkets or, more often, suspended from the ceiling like helium balloons. They arrive in shops well before Easter Sunday and can set you back a pretty penny (as much as $30 per egg!).  

Good Friday Dinner

The Friday before Pascoa holds a significant place in the Christian calendar, marking the crucifixion of Jesus Christ. In Brazil, it is customary for families to gather for a special dinner on Good Friday, often featuring fish dishes. This tradition reflects the Catholic practice of abstaining from meat on Fridays during Lent, the period of fasting and penance leading up to Easter.

Bacalhau is a kind of salt cod that features in a variety of recipes, and will typically be found in some form for dinner on Good Friday. Bacalhau com natas is a favorite, as are fried fish balls called bolinhos de bacalhau. 

Minas Gerais Páscoa Flower Carpet

In the state of Minas Gerais and other regions, Easter is celebrated with a unique tradition known as the flower carpet, or tapete de flores. This involves creating elaborate designs using flower petals and colored sand. In some areas, children dressed in white sing hymns while the carpet is being made. 

Blooms for Palm Sunday

A species of flower called the macela, is a beautiful, tropical bloom that flowers only around Easter. For this reason, it is often brought to mass on Palm Sunday, the Sunday before Pascoa. The auspicious flowers are also used for a variety of medicinal purposes, from indigestion-curing teas to crushed petals stuffed in pillow cases to promote sleep. 

Painting of Cats and Dogs in Ivoti

In the town of Ivoti, there is a rumor that takes on a whimsical tone with the tradition of painting cats and dogs. According to local lore, this playful custom originated centuries ago when villagers would paint animals to let the children know that Easter was on its way. 

Easter Dinner Made Simple

Wondering what to serve for Easter dinner? We can help! You can either enjoy a delicious meal tableside at one of our 50+ locations, or order a beautiful dinner to go. Or, purchase one of our hand-curated butcher boxes to have premium cuts of meat, like Australian rack of lamb, delivered right to your door. 

Cornmeal Porridge With Coconut Milk (Canjica)

blue bowl of cornmeal porridge topped with cinnamon sticks

jump to recipe button

Corn dishes are extremely popular in Brazil, especially in sweet favorites like curao de milho, cornmeal cake, and pamonhas. Today’s recipe is another sweet treat featuring corn: cornmeal porridge with coconut milk and, of course, sweetened condensed milk. Infused with warming spices, it is the perfect comfort dish on a cold winter morning. 

Do Brazilians Eat Cornmeal Porridge for Breakfast?

Generally speaking, breakfast in Brazil is a light meal with milky coffee and a little starch, like a buttered roll or slice of baguette. While porridge is generally consumed in the States as a breakfast item, this creamy cornmeal version is more often eaten as a dessert or snack during the Festas Juninas in Brazil. 

The Festas Juninas take place shortly after the country’s second harvest of sweet corn. They honor St. John the Baptist and are meant to celebrate the harvest, with plenty of corn dishes for sale. It is, after all, winter in the Southern Hemisphere, so warm, comforting dishes are in order. As a cheap and plentiful crop, you’ll find corn just about everywhere: popcorn, roasted corn on the cob, sweet corn pudding, cornmeal cakes, and even on top of hot dogs

Where Does Cornmeal Porridge Come From?

Cornmeal porridge is called “canjica” in Portuguese. Like many dishes, it likely arrived with slaves from West Africa. The Bantu languages have similar words to describe dishes made from ground corn. 

From Portuguese, “canjica” also refers to hominy, which is dried corn kernels that have been soaked in an alkali solution (sometimes lye). Traditional Brazilian recipes for canjica often call for canned or dried hominy in place of cornmeal. This is certainly an option, but we like the cornmeal for simplicity and speed.

Toppings for Cornmeal Porridge?

This canjica is already infused with lovely spices and vanilla, as well as that sweet shredded coconut. It really doesn’t need much on top, except another dash of cinnamon and a few coconut flakes. That being said, you can kick it up a notch with a few toppings that pair well with the other flavors:

  • Fruit: bananas, peaches, and apples work especially well with the cinnamon and coconut
  • Cream: a splash of heavy whipping cream never goes amiss with a good bowl of porridge
  • Roasted peanuts: many Brazilians like to top their canjica with some chopped roasted peanuts for added crunch and flavor
  • Shaved chocolate: why not? Chocolate is always welcome, and with the cinnamon, the taste would be reminiscent of a lovely Mexican hot chocolate. 

Cornmeal Pudding Recipe 

Ingredients:

1 cup cornmeal
2 cups water
1 can (13.5 oz) coconut milk
1/2 cup shredded coconut
1/2 cup condensed milk
1 teaspoon ground cinnamon
1/2 teaspoon ground nutmeg
1 teaspoon vanilla extract
Pinch of salt (optional, to taste)
Additional condensed milk or brown sugar for sweetening (optional)

Instructions:

  1. Prepare the Cornmeal Mixture: in a bowl, mix the cornmeal with 1 cup of water until it forms a smooth paste.
  2. Cook the Cornmeal Mixture: in a pot, bring the remaining 1 cup of water to a boil. Once boiling, gradually add the cornmeal mixture to the pot while stirring continuously to prevent lumps from forming.
  3. Add Coconut Milk and Shredded Coconut: lower the heat to medium and stir in the coconut milk and shredded coconut. Let the mixture simmer gently for about 10-15 minutes, stirring occasionally, until it thickens to your desired consistency.
  4. Add Condensed Milk and Spices: pour in the condensed milk and stir well to combine. Add the ground cinnamon, ground nutmeg, vanilla extract, and a pinch of salt if desired. Continue to simmer for an additional 5 minutes, allowing the flavors to meld together.
  5. Adjust Consistency and Sweetness: if the porridge is too thick, you can add more water or coconut milk to reach your desired consistency. Taste and adjust sweetness by adding more condensed milk or brown sugar, if needed.
  6. Serve: once the porridge reaches your preferred consistency and sweetness, remove it from the heat. Serve warm in bowls, garnished with a sprinkle of ground cinnamon or shredded coconut on top if desired.

Enjoy!


You´re headed off-site..

Would you like to checkout now?

You're switching shops with items in your cart. Our Gift Card products are sold from a seperate shop than our Butcher Shop & Merchandise products and require seperate checkouts.

If you wish to return to your Gift Card cart, simply navigate back to a Gift Card product page and click the cart icon - if you don't see your products please toggle between our different shopping carts.